
In the early years of my culinary life, I wasn't really one for slow-cookers, and in the early years of my whole life, the same could be said of pork. Pork is dry, pork is flavorless, and pork chops are a poor man's steak. Right?
Wrong!
Believe it or not, pork is a unique meat that needs to be treated and cooked very differently than chicken or beef. And when you get it right, oh how the magic does happen. Magic like my slow cooker pork au jus. Here's what you need.
Ingredients:
3-4 lb boneless pork shoulder/butt (yes, in the pig world, shoulders and butts are interchangeable)
4 cloves of garlic, crushed
1/2 cup chicken stock
1/4 cup white wine, something dry, and something that tastes good on its own (I used a California Sauvignon Blanc)
2-3 sprigs of fresh thyme
1.5 tbsp. vegetable oil
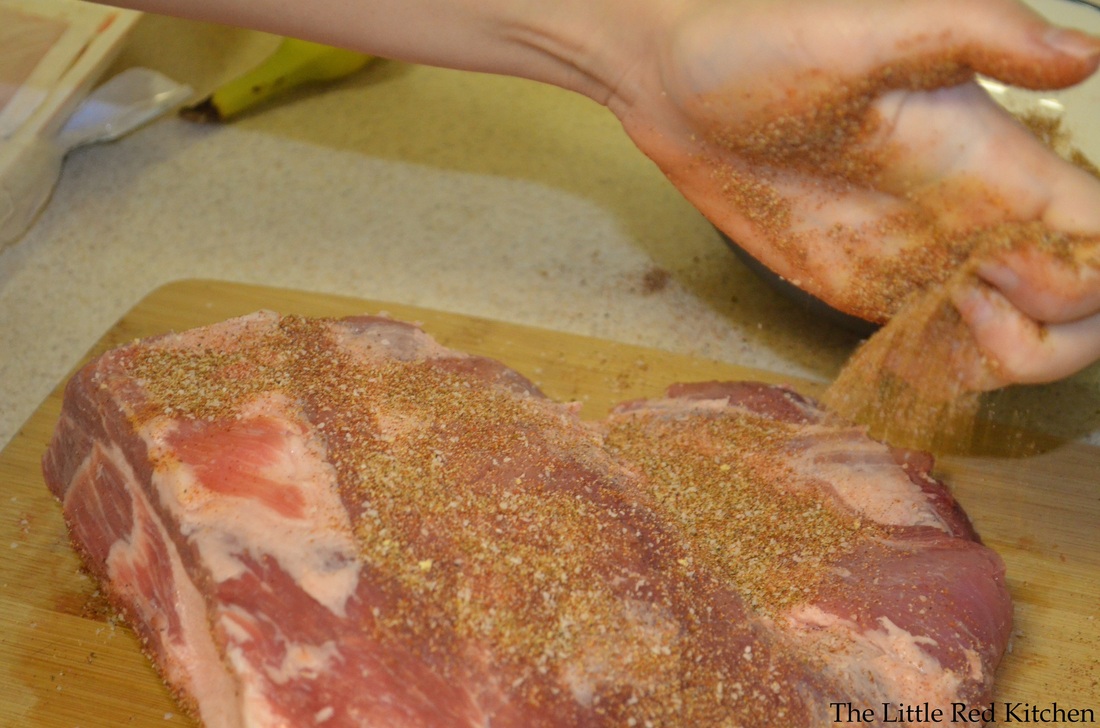
Spice Rub:
1 tbsp. sweet paprika
1 tbsp. Old Bay seasoning
1/2 tbsp. onion powder
1/2 tbsp. garlic powder
1 tbsp. kosher salt
1/2 tbsp. black pepper
I got the idea for this spice rub from a magazine article and I was completely intrigued with the concept of using Old Bay on pork. Who ever heard of such a thing?? And after playing around with ratios, I think I found an amazing rub. Even better, the ratios stay the same, so if you want to use it to smother, say, a bone-in rib chop, just halve the amounts and go right ahead!
Step 1:
Trim the pork roast of excess fat. By excess, I mean any fat that exceeds 1/4 inch thickness or is tough/sinewy. In this application though, fat is GOOD. Fat = flavor, and fat protects the meat during those long hours in the cooker, so don't go overboard.
Wrong!
Believe it or not, pork is a unique meat that needs to be treated and cooked very differently than chicken or beef. And when you get it right, oh how the magic does happen. Magic like my slow cooker pork au jus. Here's what you need.
Ingredients:
3-4 lb boneless pork shoulder/butt (yes, in the pig world, shoulders and butts are interchangeable)
4 cloves of garlic, crushed
1/2 cup chicken stock
1/4 cup white wine, something dry, and something that tastes good on its own (I used a California Sauvignon Blanc)
2-3 sprigs of fresh thyme
1.5 tbsp. vegetable oil
Spice Rub:
1 tbsp. sweet paprika
1 tbsp. Old Bay seasoning
1/2 tbsp. onion powder
1/2 tbsp. garlic powder
1 tbsp. kosher salt
1/2 tbsp. black pepper
I got the idea for this spice rub from a magazine article and I was completely intrigued with the concept of using Old Bay on pork. Who ever heard of such a thing?? And after playing around with ratios, I think I found an amazing rub. Even better, the ratios stay the same, so if you want to use it to smother, say, a bone-in rib chop, just halve the amounts and go right ahead!
Step 1:
Trim the pork roast of excess fat. By excess, I mean any fat that exceeds 1/4 inch thickness or is tough/sinewy. In this application though, fat is GOOD. Fat = flavor, and fat protects the meat during those long hours in the cooker, so don't go overboard.
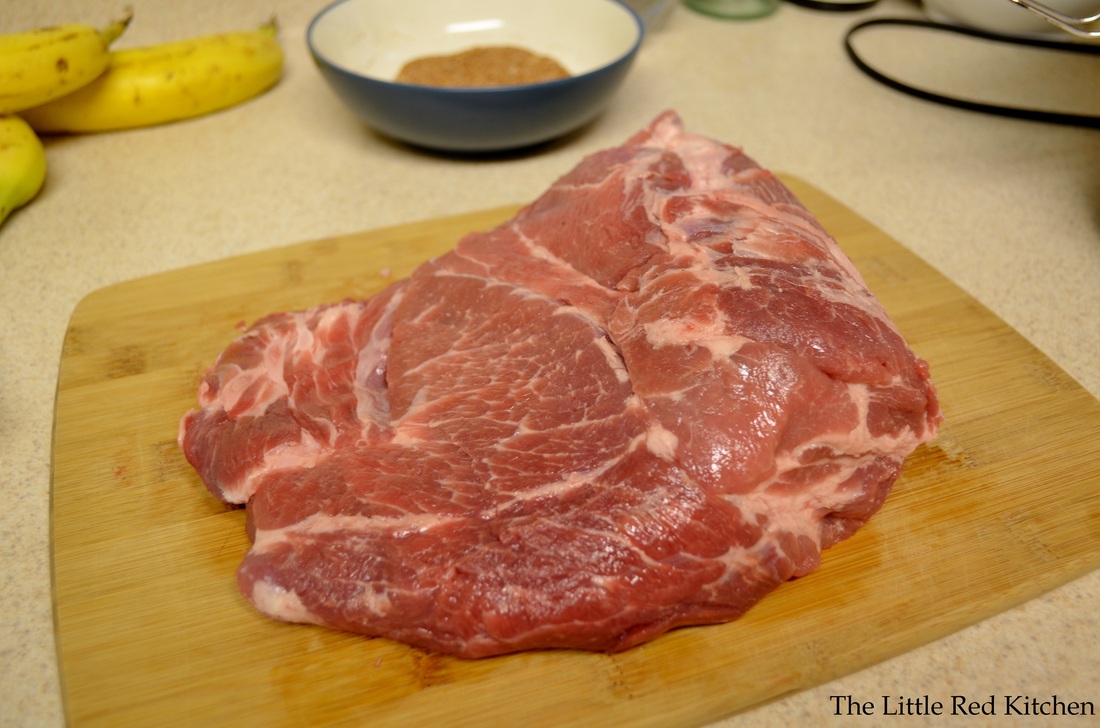
Beautiful.
Step 2:
Apply the spice rub liberally to all surfaces of the meat, massaging it in as you go.
Step 2:
Apply the spice rub liberally to all surfaces of the meat, massaging it in as you go.
Step 3:
I know this step is going to be controversial for a slow cooker recipe, but you'll just have to hear me out and trust me; and, trust the science!
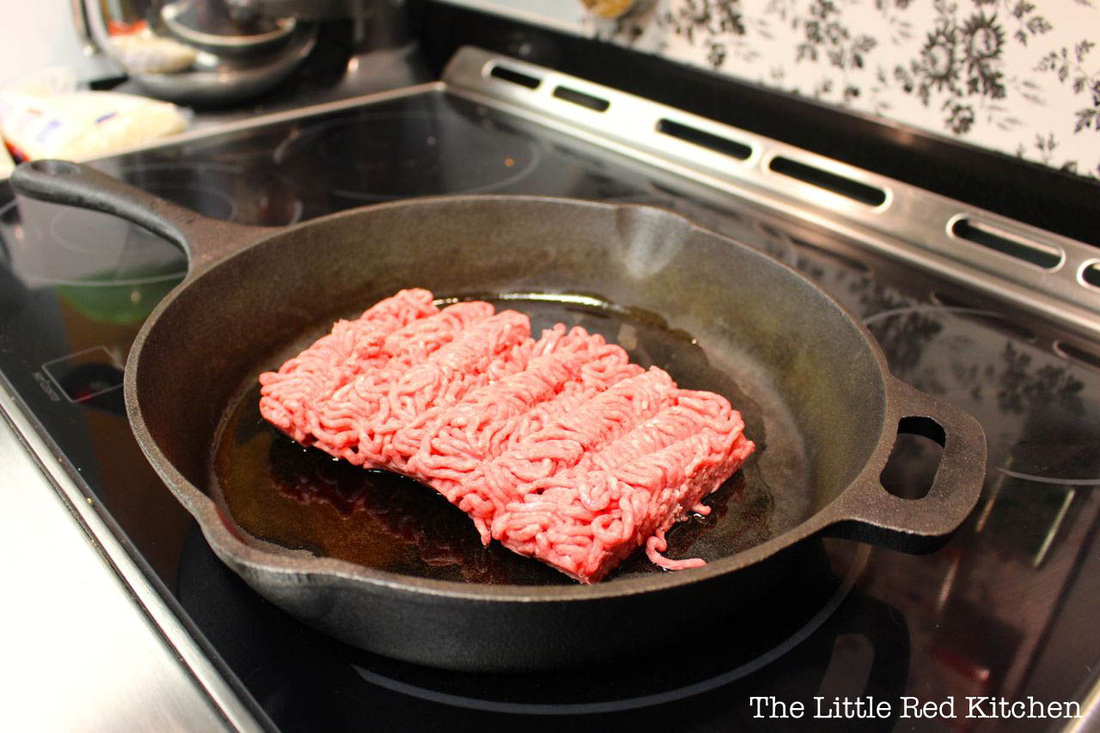
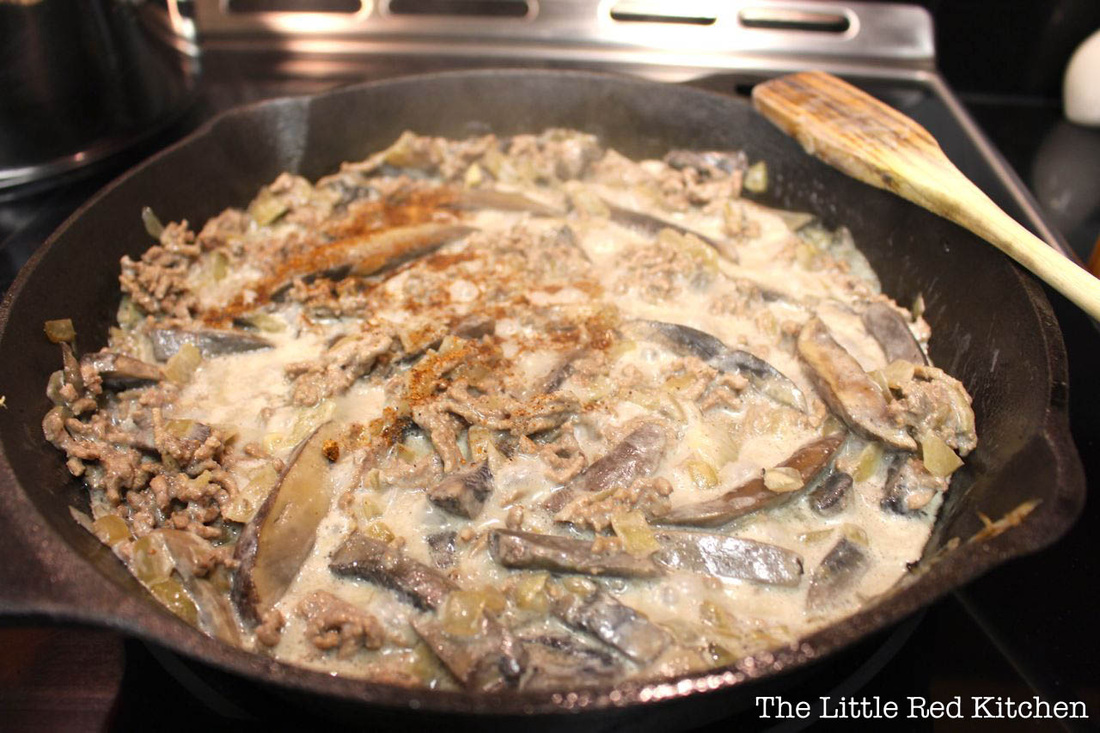
Heat the vegetable oil in a large skillet or Dutch oven over medium high-high heat, until it's shimmering and very hot. Then brown the pork roast on both sides, for a total of 4-5 minutes, and transfer it to your slow cooker.
I know what you are thinking: I thought this was a slow cooker recipe? Set it and forget it and whatnot! Well, it is, and after this step, this becomes a hands-off recipe. But the thing is, there are certain flavor compounds in spices that are only unlocked by fat, in this case oil, and that oil needs to be HOT in order to 'bloom' those spices. It is worth this extra 5 minute step and a dirty pan to get that extra flavor out of your rub! Just look at the amazing crust you will develop on your pork.
I know this step is going to be controversial for a slow cooker recipe, but you'll just have to hear me out and trust me; and, trust the science!
Heat the vegetable oil in a large skillet or Dutch oven over medium high-high heat, until it's shimmering and very hot. Then brown the pork roast on both sides, for a total of 4-5 minutes, and transfer it to your slow cooker.
I know what you are thinking: I thought this was a slow cooker recipe? Set it and forget it and whatnot! Well, it is, and after this step, this becomes a hands-off recipe. But the thing is, there are certain flavor compounds in spices that are only unlocked by fat, in this case oil, and that oil needs to be HOT in order to 'bloom' those spices. It is worth this extra 5 minute step and a dirty pan to get that extra flavor out of your rub! Just look at the amazing crust you will develop on your pork.
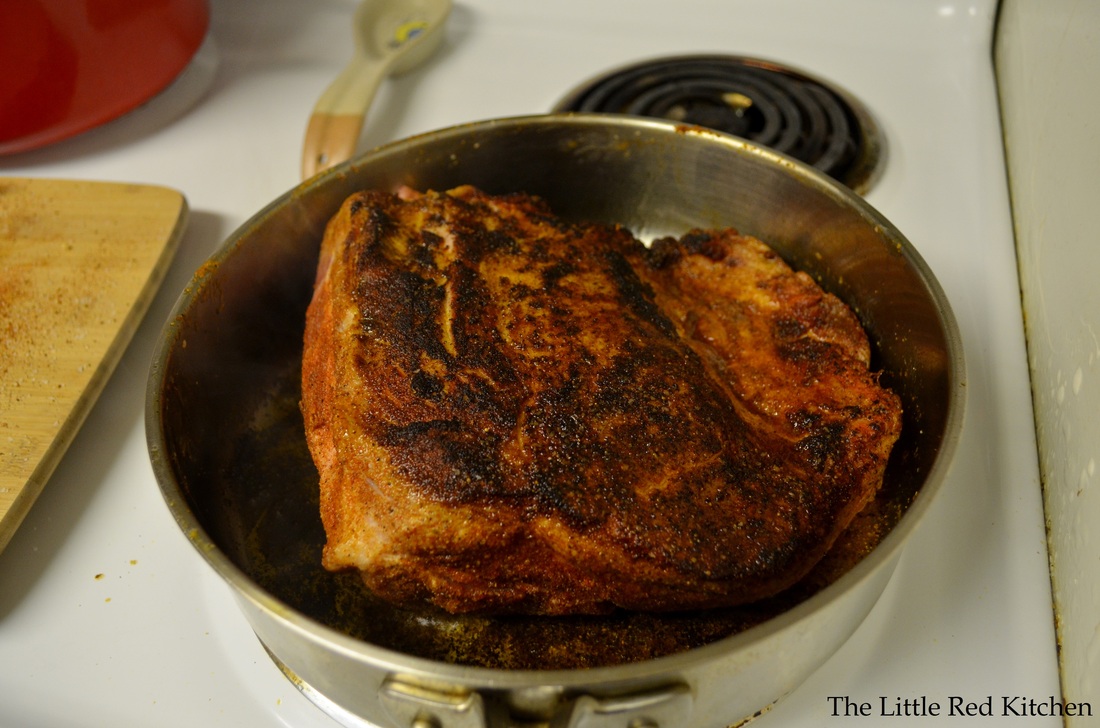
Like fat, that dark color = flavor!
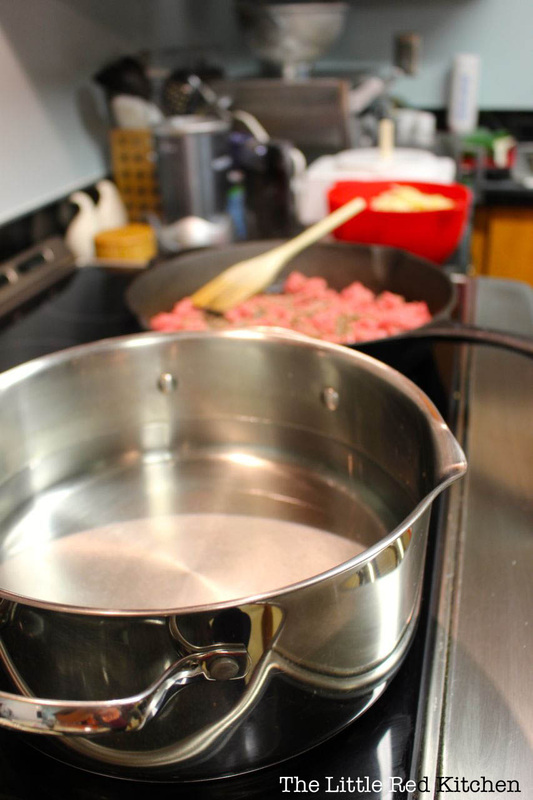
Step 4:
That pork left behind some yummy brown bits, or fond, in the bottom of the pan, and you will want them for the au jus! So at this point, deglaze that sucker with the wine and 1/4 cup of the chicken stock, scraping up the crust on the bottom as you go. Bring to a gentle simmer and add the remaining 1/4 cup of chicken stock, the garlic, and the thyme. Then dump the whole mixture into the slow cooker with the pork, and that's it!
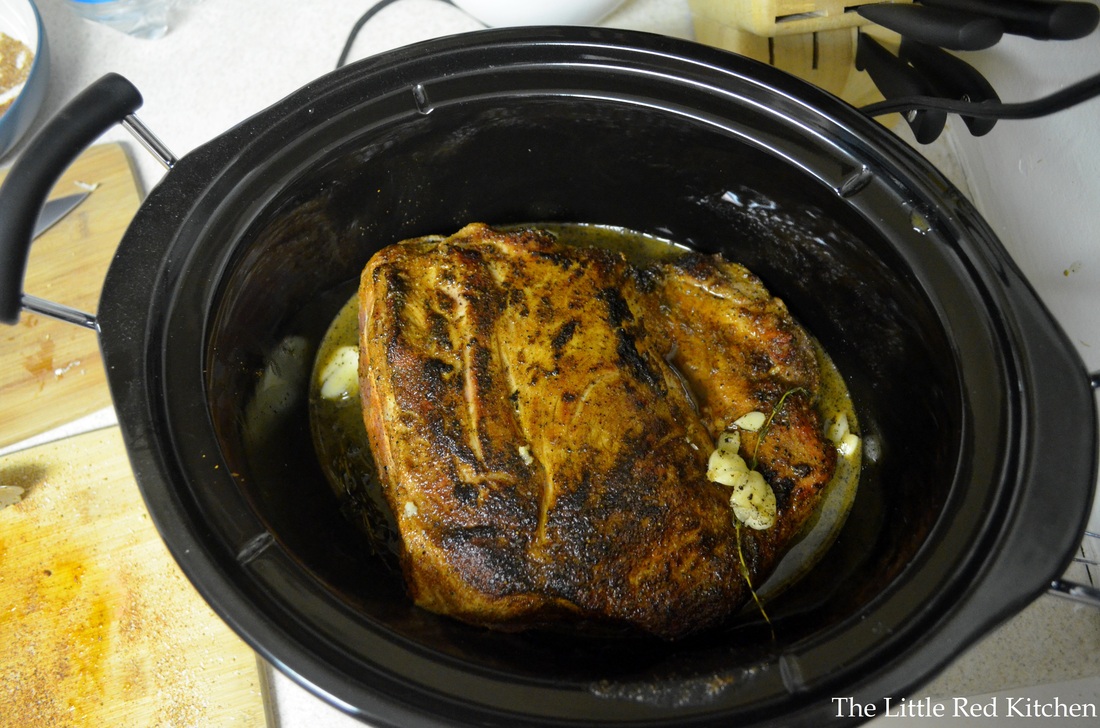
Cook the pork on low for 8-9 hours. You will know when it's ready; when you poke it with a fork or tongs, it will literally be falling apart. At this point transfer the roast to a large bowl and let sit for 10 minutes, then break up the meat into large shreds with 2 forks. It is so juicy and tender at this point, it's unreal.

Fish the thyme sprigs out of the cooker and toss them, and mash up the garlic cloves into the liquid. If you want to try to skim the fat off of the jus right away you can, but it's easiest once the jus has cooled down, so I just waited until the next day to do that. And speaking of the jus, you should have around 2 cups of this insanely flavorful liquid, just waiting for a pork sandwich to be dunked into it.
I used a 3.75 lb roast and it made enough pork for 10-12 sandwiches on small hamburger buns, which was all we had, though this really is preferable on a large Kaiser roll or a long roll, like French dip sandwiches get served in. On larger buns you will probably get around 8 sandwiches!
I used a 3.75 lb roast and it made enough pork for 10-12 sandwiches on small hamburger buns, which was all we had, though this really is preferable on a large Kaiser roll or a long roll, like French dip sandwiches get served in. On larger buns you will probably get around 8 sandwiches!
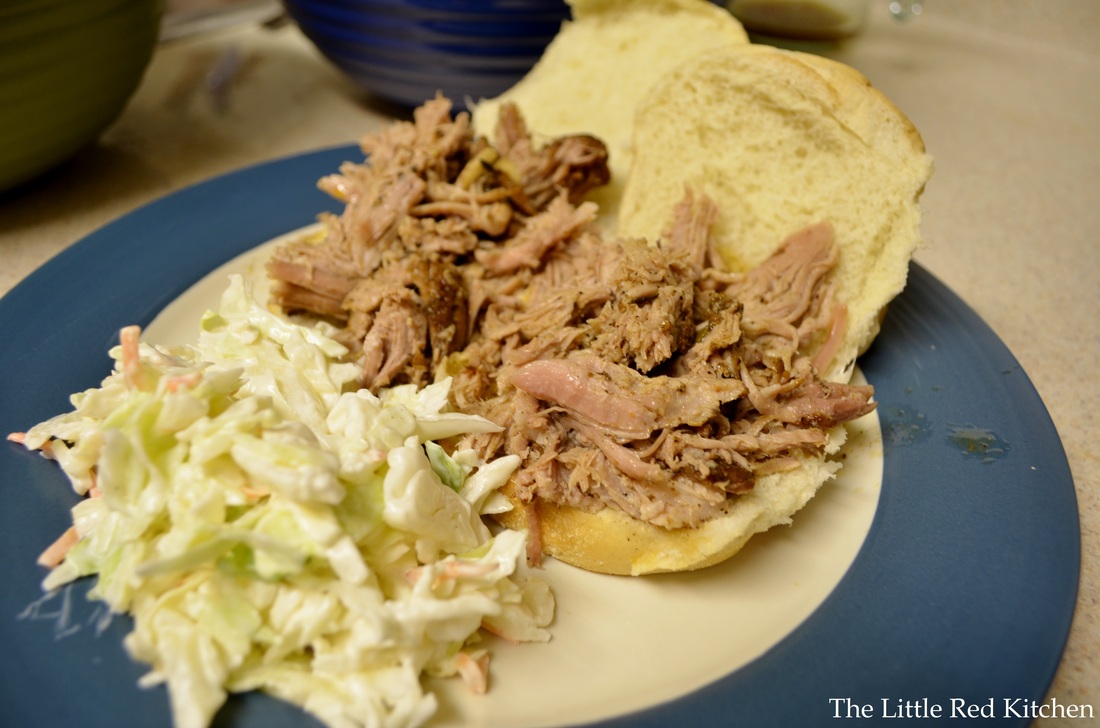
If you're like me and you've had a strong aversion to pork, I hope you will give the other white meat a chance!
Happy cooking,
Lauren
Happy cooking,
Lauren


 RSS Feed