
Talk about some comfort food!
Okay, so comfort food is something we all crave when the weather turns. I don't know if it's from childhood memories or it's more primal than that, but something in our bellies wants stick-to-your-ribs goodness this time of year. Unfortunately, that goodness comes at the price of pants buttons popping and food-induced comas. So I wondered to myself, does comfort food have to give us that feeling that we never want to even look at food again?
That being said, I decided to tackle the classic Southern American dish, chicken and dumplings, and make it a little less heavy. By creating a broth-based soup, instead of a thick gravy, and by adding tons of veggies and fresh herbs, I think I may have done just that!
Ingredients:
Stew:
2 large chicken breasts, trimmed of excess fat
kosher salt and pepper
2 tbsp. olive oil
1-1.5 cups chopped yellow onion (1 medium onion)
2 garlic cloves, minced
1 sprig of fresh thyme (substitute 1/2 tsp. dried thyme if you need to)
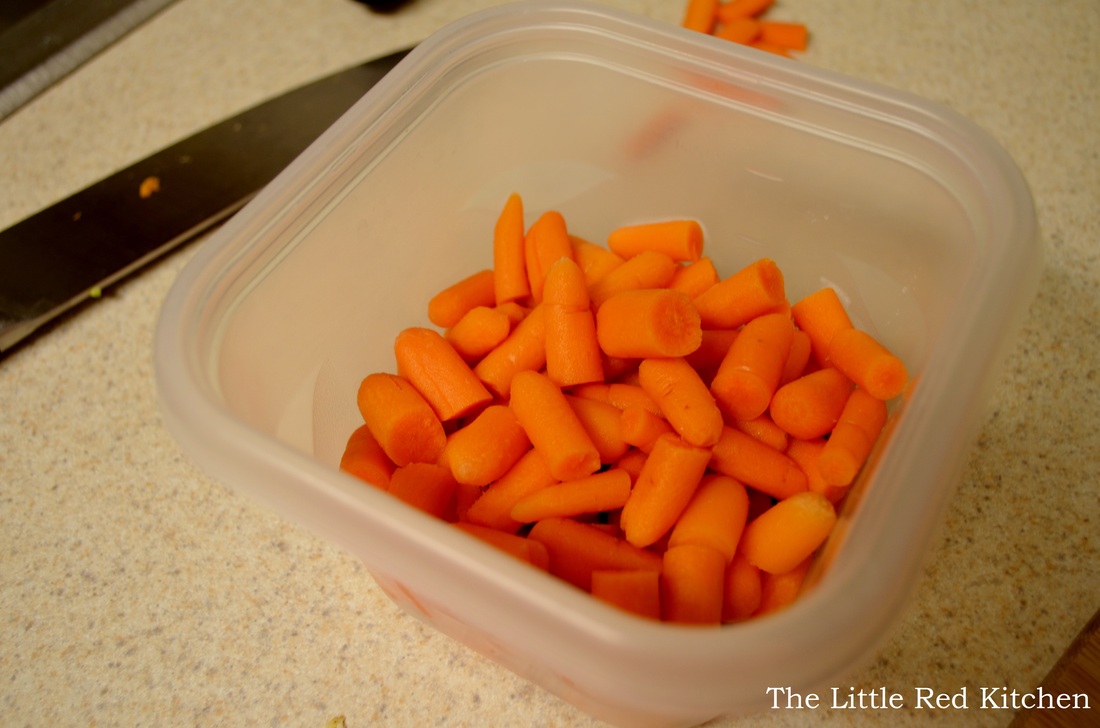
2 cups of carrots, chopped into roughly 1/2-inch pieces (believe it or not I only had baby carrots on hand so I simply cut them in half!)
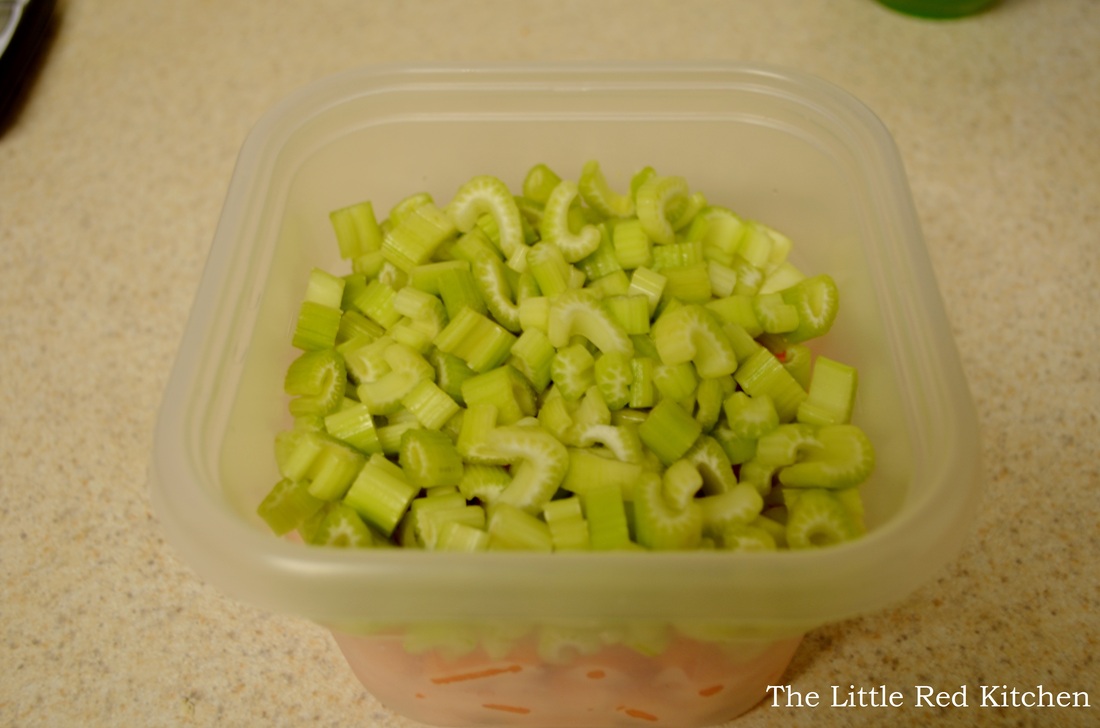
1 cup of celery, stalks chopped 1/4-inch thick
1/4 cup flour
6 cups chicken stock (I don't need to tell you that homemade is better. I happened to have some in my freezer, but 90% of the time I don't, so low sodium chicken stock is A-Okay)
1 cup water
3 tbsp. chopped fresh dill, divided in half (use 1.5 tbsp. if substituting dried dill)
4 tbsp. chopped fresh parsley, divided in half (dried parsley is like rabbit food. do NOT substitute.)
Herbed dumplings:
2 cups all-purpose flour
1/2 tsp. kosher salt
1/8 tsp. ground black pepper
1 tbsp. baking powder
1/2 cup heavy cream
1/2 cup buttermilk (You may use a whole cup of heavy cream if you wish, and omit the buttermilk)
2 tbsp. butter
*I forgot to count as I was making them, but I think the dumpling batter makes about 20 dumplings, if not more. This dish will definitely serve up to 6 people.
Step 1:
Pre-heat oven to 375 degrees. Season both sides of the chicken breasts with kosher salt and pepper and place on a rimmed baking sheet (I almost always use parchment paper because it makes clean-up a breeze.) Bake on the middle rack in the oven for 20-25 minutes, or until the chicken's internal temperature registers 160 degrees. Allow to cool, then using 2 forks, break the chicken up into large shreds. You should get 3-4 cups worth. Cover and set aside.
Okay, so comfort food is something we all crave when the weather turns. I don't know if it's from childhood memories or it's more primal than that, but something in our bellies wants stick-to-your-ribs goodness this time of year. Unfortunately, that goodness comes at the price of pants buttons popping and food-induced comas. So I wondered to myself, does comfort food have to give us that feeling that we never want to even look at food again?
That being said, I decided to tackle the classic Southern American dish, chicken and dumplings, and make it a little less heavy. By creating a broth-based soup, instead of a thick gravy, and by adding tons of veggies and fresh herbs, I think I may have done just that!
Ingredients:
Stew:
2 large chicken breasts, trimmed of excess fat
kosher salt and pepper
2 tbsp. olive oil
1-1.5 cups chopped yellow onion (1 medium onion)
2 garlic cloves, minced
1 sprig of fresh thyme (substitute 1/2 tsp. dried thyme if you need to)
2 cups of carrots, chopped into roughly 1/2-inch pieces (believe it or not I only had baby carrots on hand so I simply cut them in half!)
1 cup of celery, stalks chopped 1/4-inch thick
1/4 cup flour
6 cups chicken stock (I don't need to tell you that homemade is better. I happened to have some in my freezer, but 90% of the time I don't, so low sodium chicken stock is A-Okay)
1 cup water
3 tbsp. chopped fresh dill, divided in half (use 1.5 tbsp. if substituting dried dill)
4 tbsp. chopped fresh parsley, divided in half (dried parsley is like rabbit food. do NOT substitute.)
Herbed dumplings:
2 cups all-purpose flour
1/2 tsp. kosher salt
1/8 tsp. ground black pepper
1 tbsp. baking powder
1/2 cup heavy cream
1/2 cup buttermilk (You may use a whole cup of heavy cream if you wish, and omit the buttermilk)
2 tbsp. butter
*I forgot to count as I was making them, but I think the dumpling batter makes about 20 dumplings, if not more. This dish will definitely serve up to 6 people.
Step 1:
Pre-heat oven to 375 degrees. Season both sides of the chicken breasts with kosher salt and pepper and place on a rimmed baking sheet (I almost always use parchment paper because it makes clean-up a breeze.) Bake on the middle rack in the oven for 20-25 minutes, or until the chicken's internal temperature registers 160 degrees. Allow to cool, then using 2 forks, break the chicken up into large shreds. You should get 3-4 cups worth. Cover and set aside.
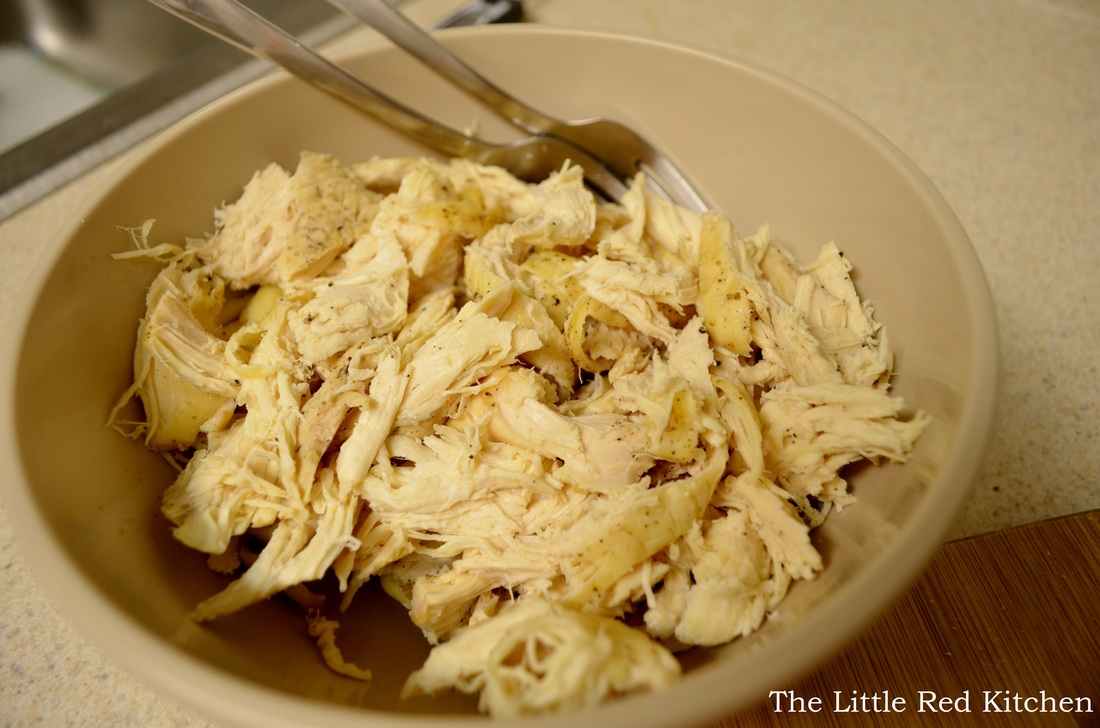
A small note, I prepped almost everything in advance and just left it in the fridge for the afternoon. Come dinner time I just had to assemble the soup and make the dumplings, which made things so easy!
Step 2:
Pour the olive oil in a Dutch oven or heavy-bottomed large pot and turn on to medium-low heat. Add onion, 1/2 tsp, of kosher salt and 1/4 tsp. of black pepper. Cook until the onions are softened and slightly translucent, 5-7 minutes. (Keep the heat on medium-low, we're not looking to brown!)
Step 3:
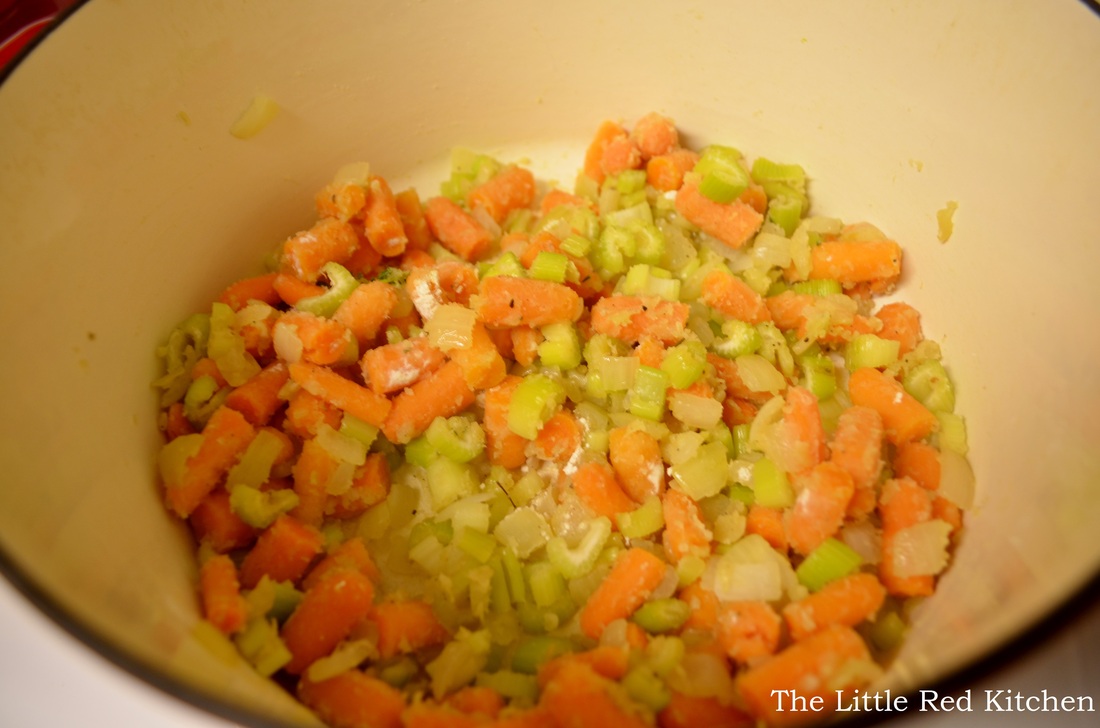
Add the minced garlic and thyme and cook for 30 seconds, until fragrant. Then add the carrots and celery. Stir to combine.
Pour the olive oil in a Dutch oven or heavy-bottomed large pot and turn on to medium-low heat. Add onion, 1/2 tsp, of kosher salt and 1/4 tsp. of black pepper. Cook until the onions are softened and slightly translucent, 5-7 minutes. (Keep the heat on medium-low, we're not looking to brown!)
Step 3:
Add the minced garlic and thyme and cook for 30 seconds, until fragrant. Then add the carrots and celery. Stir to combine.
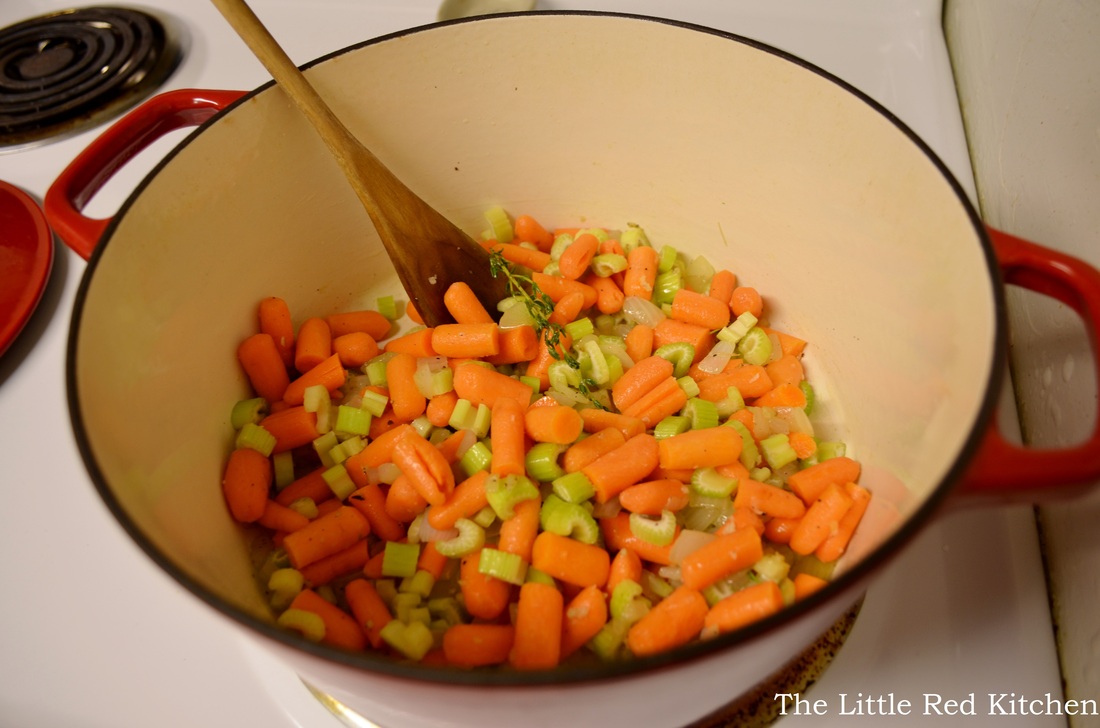
Cover and cook for about 10 minutes, until the carrots have softened slightly and the celery is turning translucent, stirring halfway through.
Step 4:
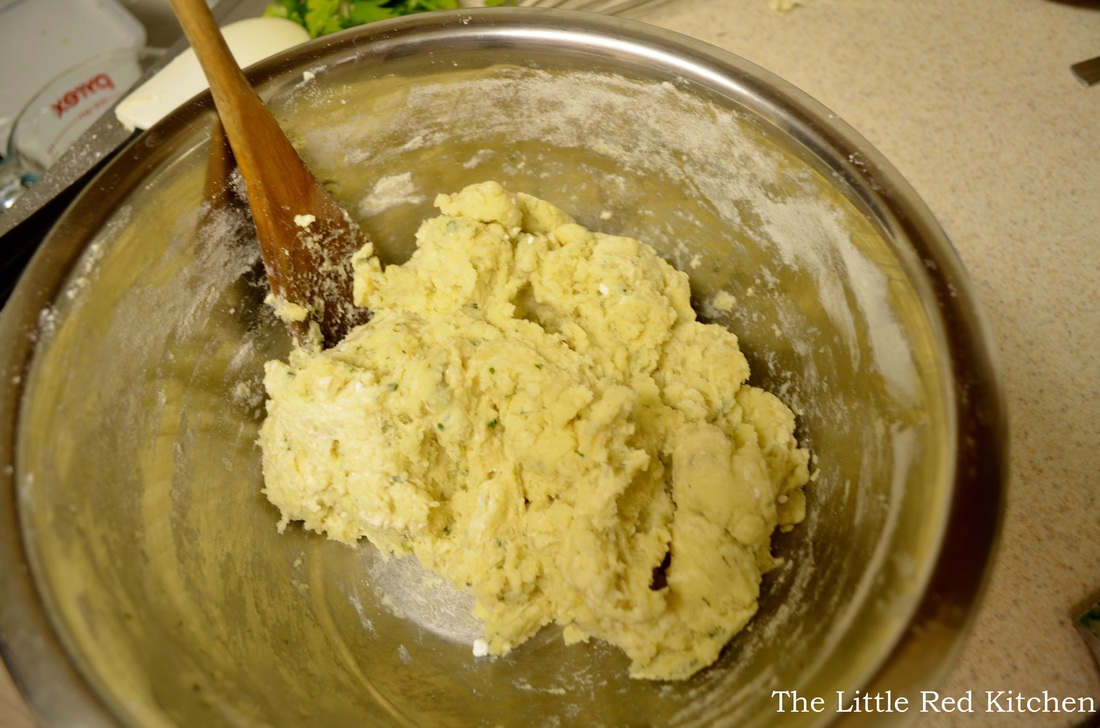
While the carrots and celery are cooking, it's a good time to form the dumpling dough, which doesn't take long at all. Combine the flour, salt and pepper, and baking powder in a medium-sized bowl and stir to combine. In a small saucepan, combine the heavy cream, buttermilk, butter, and half of the total dill and parsley. When it just comes to a simmer, pour it onto the flour mixture and stir just enough so that the dough comes together. I had to add a couple extra tablespoons of buttermilk, which is sometimes necessary. Just try your best not to overwork the dough.
Step 4:
While the carrots and celery are cooking, it's a good time to form the dumpling dough, which doesn't take long at all. Combine the flour, salt and pepper, and baking powder in a medium-sized bowl and stir to combine. In a small saucepan, combine the heavy cream, buttermilk, butter, and half of the total dill and parsley. When it just comes to a simmer, pour it onto the flour mixture and stir just enough so that the dough comes together. I had to add a couple extra tablespoons of buttermilk, which is sometimes necessary. Just try your best not to overwork the dough.

Step 5:
When the 10 minutes are up on the veggies, add the 1/4 cup of flour and bring to medium heat, stirring the flour in until it looks gummy and weird, about a minute.
When the 10 minutes are up on the veggies, add the 1/4 cup of flour and bring to medium heat, stirring the flour in until it looks gummy and weird, about a minute.
Step 6:
Pour the chicken stock and water into the pot and bring to a boil. Once the stew reaches a boil, lower it to a simmer (medium-low), fish out the thyme sprigs and start forming the dumplings and dropping them into the pot. Just grab a couple tbsp. at a time, and roll them into loose dumplings, about 1.5 to 2-inches big.
Pour the chicken stock and water into the pot and bring to a boil. Once the stew reaches a boil, lower it to a simmer (medium-low), fish out the thyme sprigs and start forming the dumplings and dropping them into the pot. Just grab a couple tbsp. at a time, and roll them into loose dumplings, about 1.5 to 2-inches big.

Once they are all in there, place the lid on the pot and simmer gently for 25 minutes. I had a boil over. So when I say gently, I mean it. In fact, if your stew is even close to the top of the pot, leave the lid slightly off and check on it often!
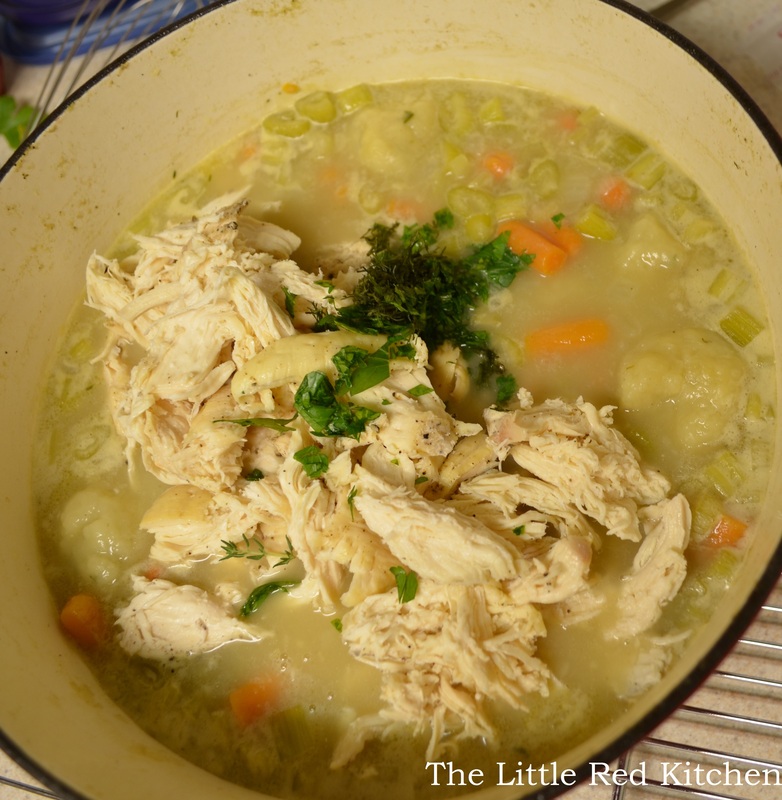
After 25 minutes, turn the heat off and take the pot off the burner. Gently stir the chicken and the remaining fresh herbs into the stew and allow to sit for 5-10 minutes. Then serve!
After 25 minutes, turn the heat off and take the pot off the burner. Gently stir the chicken and the remaining fresh herbs into the stew and allow to sit for 5-10 minutes. Then serve!
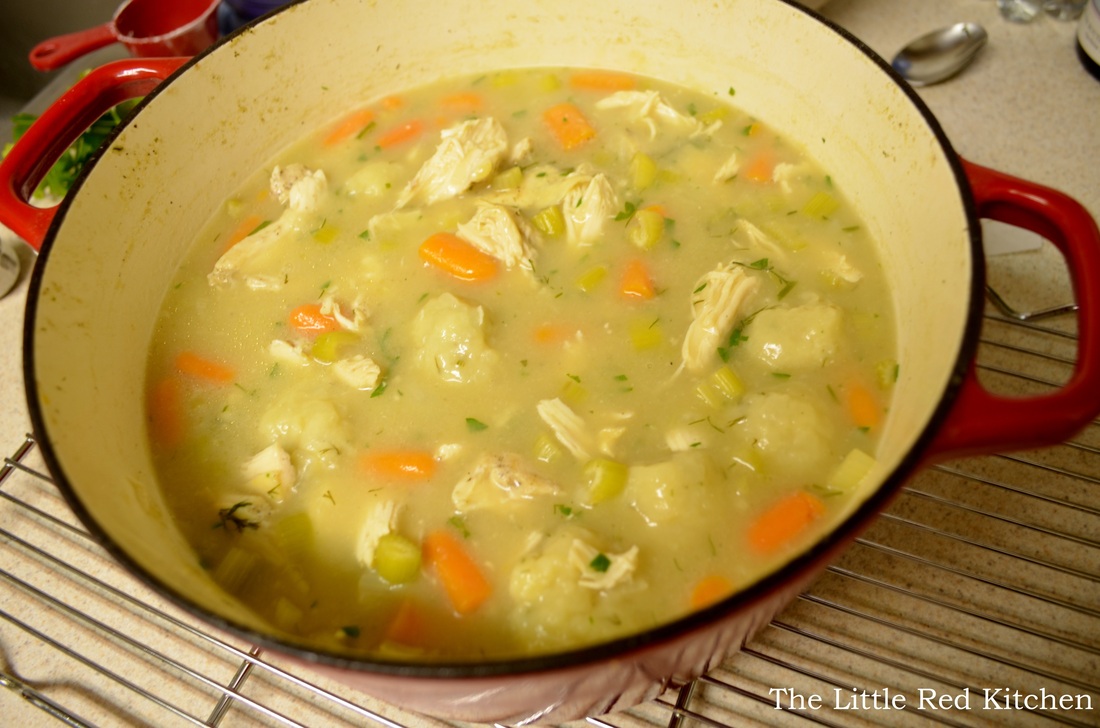
This stew has a fantastic consistency! It's thicker than a chicken noodle, but not as heavy as a dumpling gravy. And the fresh herbs are such a welcome addition to the whole dish! I particularly love the buttery, dill-y dumplings, which are just the right size that you can eat 3 or 4...or 5, or 6...and not hate yourself for the next 2 hours. The next time you are hankering for some home-cooked comfort, consider tucking in to a steaming bowl of this. :)
~Lauren
~Lauren


 RSS Feed