Good morning to all! Bringing you a different kind of post on this dreary October Monday. My husband and I had another couple over for dinner on Saturday night, and I thought I'd highlight a few items from our evening and share some tips on hosting, cooking, and making a lovely little tablescape that is NOT fussy, NOT obnoxious, and not hard at all to do!
First of all, try to do as much of the prepping, cooking, table-setting as early in the day as you can. You might think this goes without saying, but not for me. I am often guilty of making several things that have to be done right before serving, or having two separate dishes that have to have the finishing touches at the same time, right before they hit the table. Soon I'm a sweating, stressed mess. Why do this to yourself if you don't have to?? Same goes with setting a pretty little table.
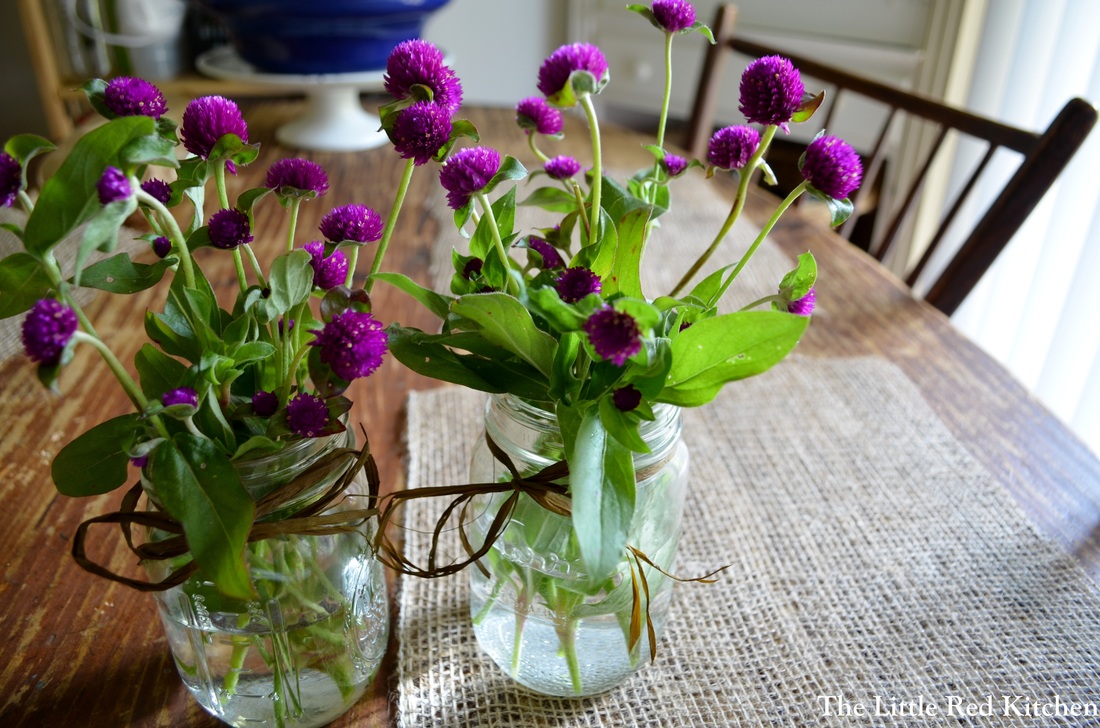
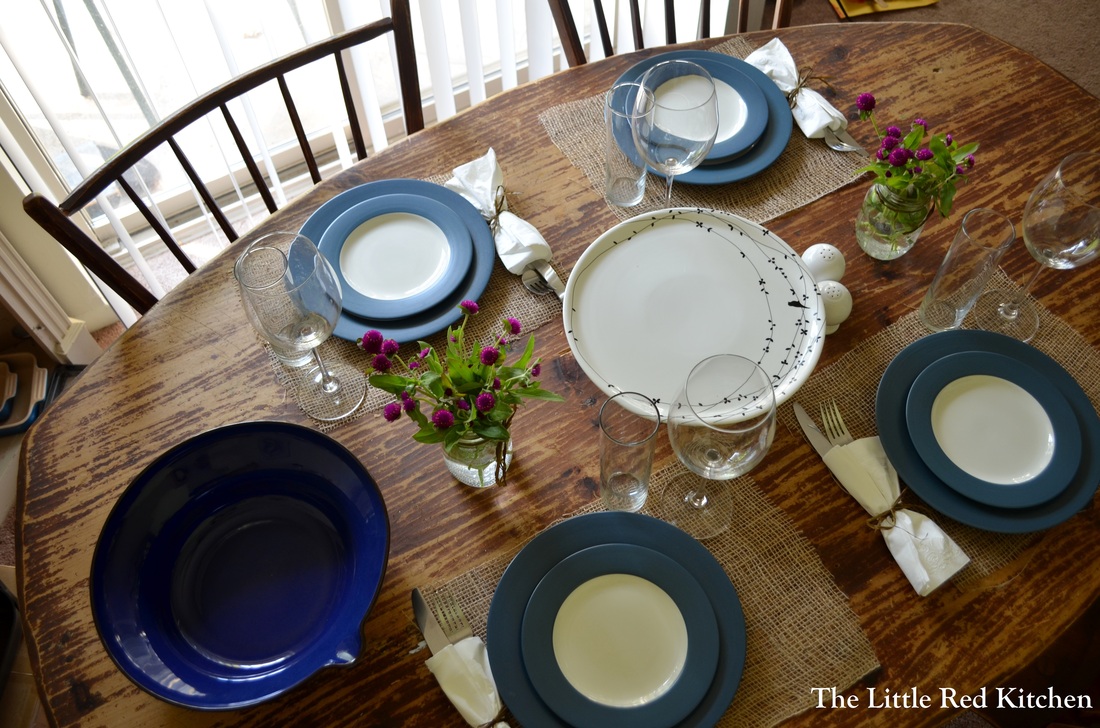
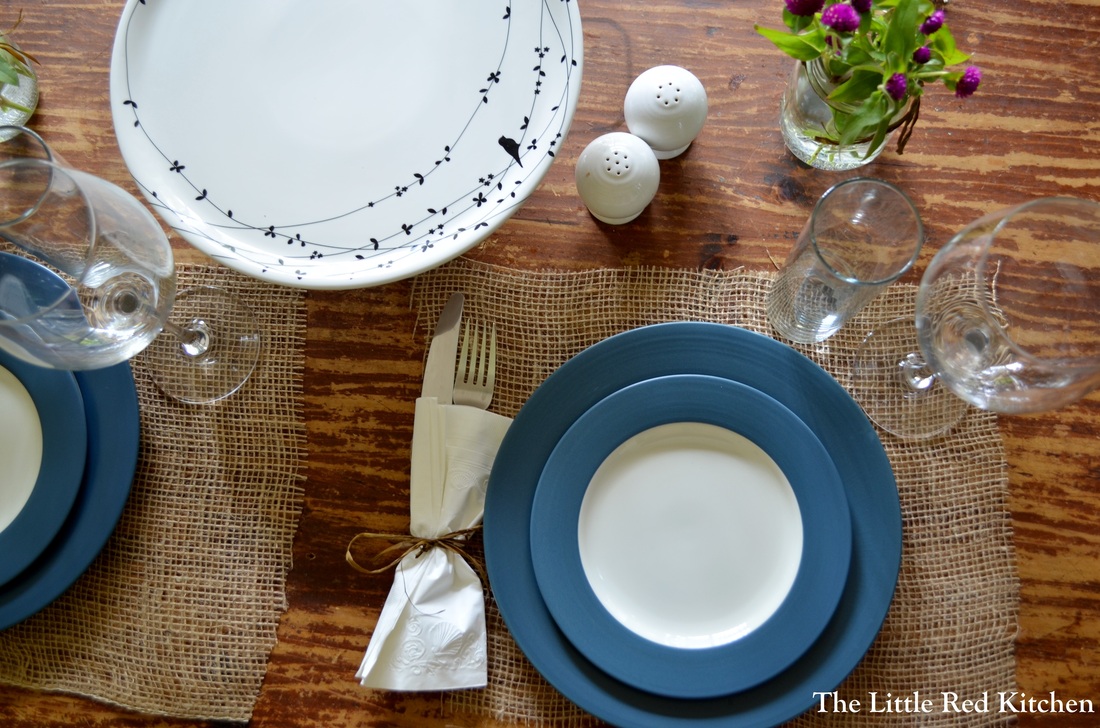
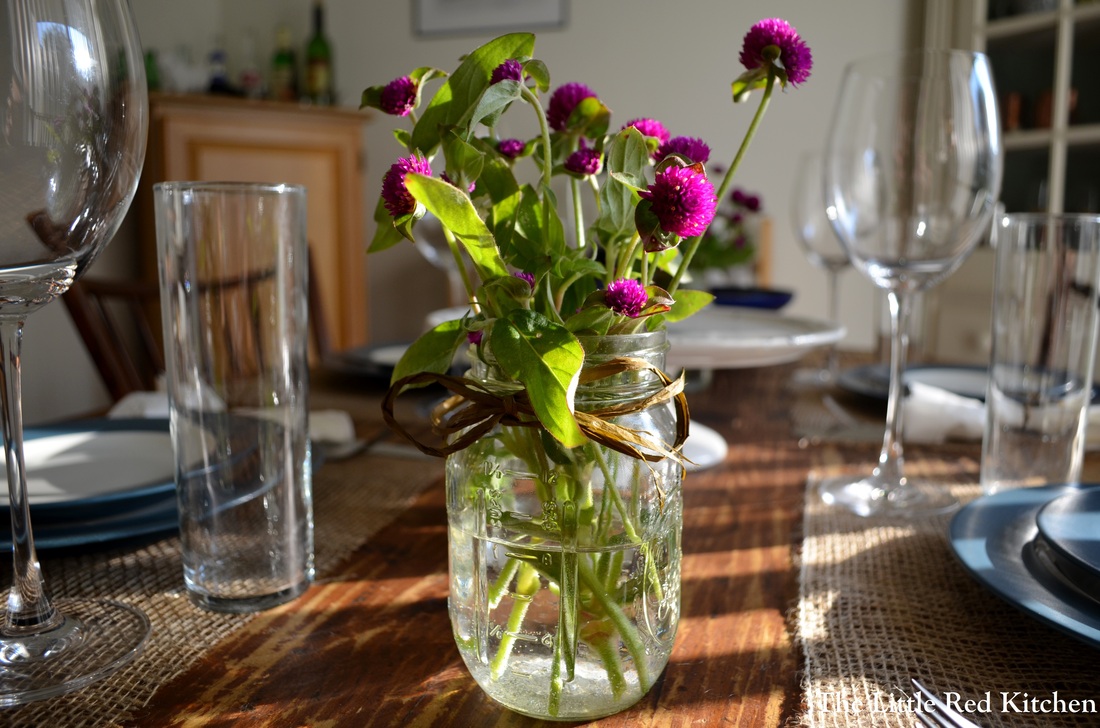
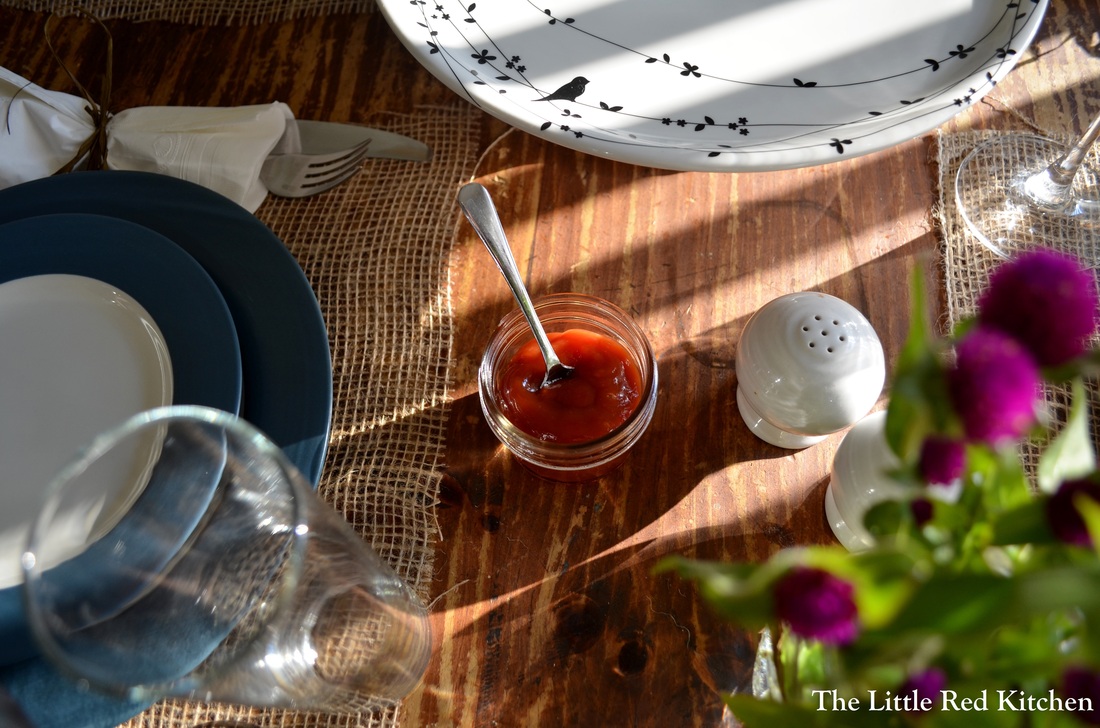
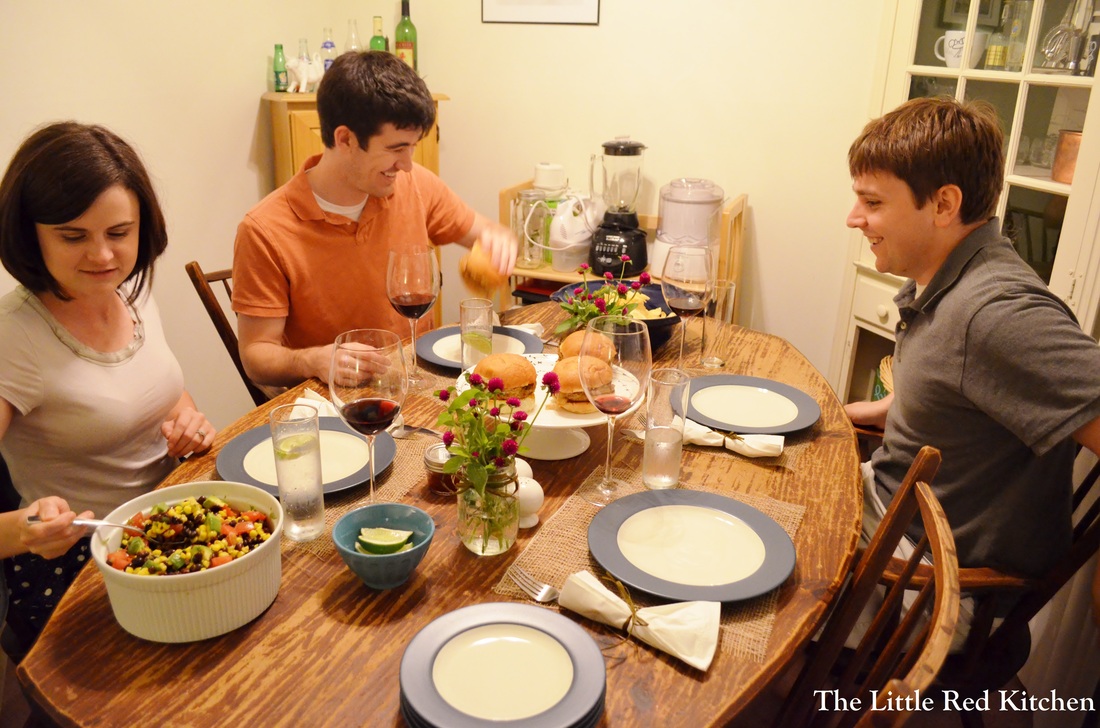
I have never been one for floral arrangements at a dinner party. Seems like an old-fashioned idea, but then I realized it doesn't have to be. And it doesn't have to be an expensive one either. I got this out of the way very early in the afternoon on Saturday. I just went to Produce Junction and scoured their bouquets, avoiding things like roses, carnations, and pre-arranged mixes of different Autumn-colored flowers. I actually hate doing things seasonally...red, yellow, and orange in the Fall, pastels in Spring, reds, greens, and metallics in Winter. I have dinnerware with blue accents and a giant indigo serving bowl, so I figured these adorable, fresh, purple flowers would complete a great color scheme! The bouquet cost $2.50 (!!!!), and I filled these two mason jars, and still had enough leftover for two vases which are now in my living room and bedroom. A simple raffia bow around the mason jars adds that more subtle Autumnal touch. I inherited this giant dining room table and chairs from my husband; it's the table set of his childhood. And to be honest, I hated it for a long time. It's huge, and we live in a small apartment. The wood is so worn out from years of use by 3 kids. I had it covered with a tablecloth for over a year, and I somehow hated that more. It was old-fashioned. But one day I decided to take it off, and I saw the table in a whole new light! Earthy, loved, and yes, maybe giant, but even when we have people over, nobody is cramped, and everybody has room to put their elbows up. :) My husband happened to have a GIANT role of burlap from Home Depot, which he bought for gardening purposes, and I simply cut rectangles out of it for placemats. It adds a little textural element between table and plates, and is a nice natural accent. I love sort of "rough" accents to contrast pretty things like mason jars of flowers and my amazing porcelain cake stand with little birds on it, which I used as a serving platter for this dinner. I didn't want to spend more than $10 dollars on this table, that was my goal. So I was not about to shell out money for cloth napkins, which, at 26 years old, I do not own yet. Instead I just tucked the silverware into long paper napkins and secured with a raffia bow. A small detail that adds another subtle something to the table. Yes, that is ketchup in a miniature mason jar with a small silver spoon. I just kept the lid on for the afternoon and took it off at meal time. I don't have a lot of serving bowls, and the mixing bowls I usually use as serving bowls did not fit into my color theme...it wouldn't have been a huge deal, but then I remembered my large soufflé dish tucked away in the cabinet and used that instead. I love the crisp white look, and it makes food pop. If you ever do invest in serving dishes, like I will someday, I highly recommend simple all white! And in the mean time, improvise and use whatever you have on hand!
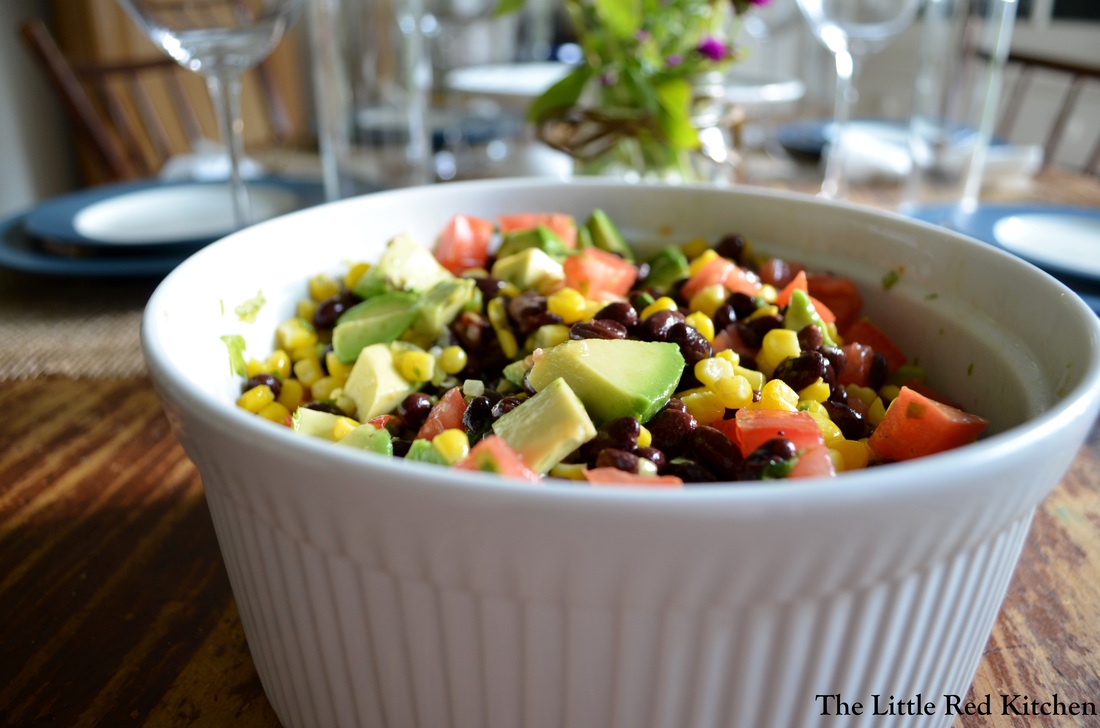
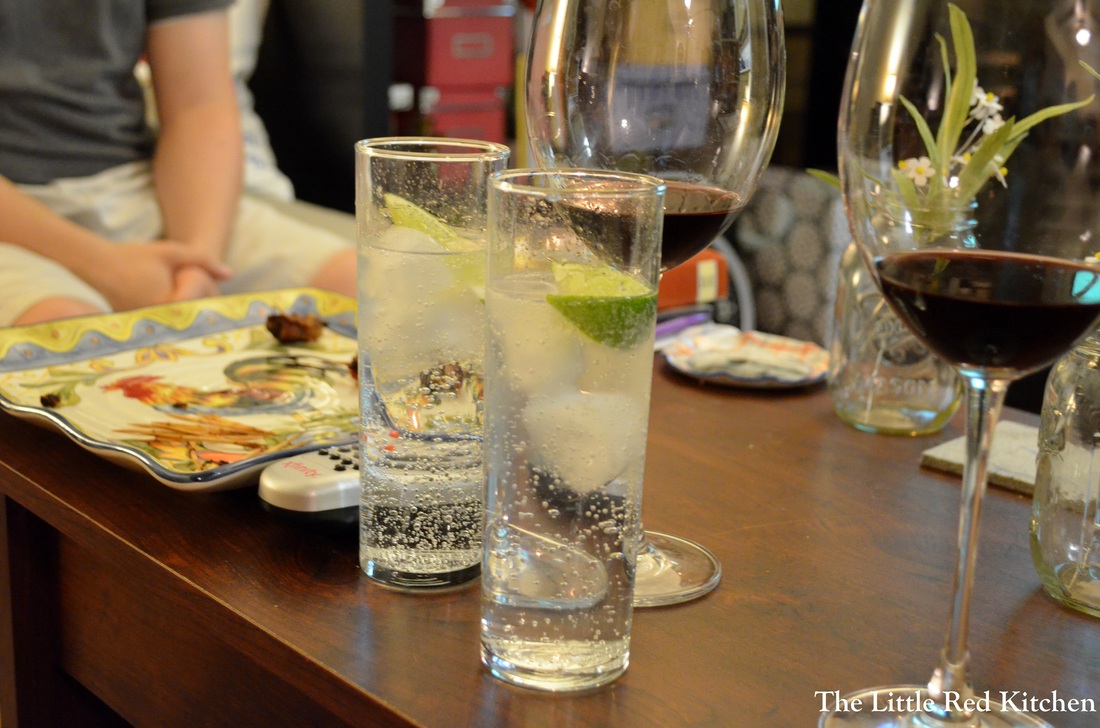
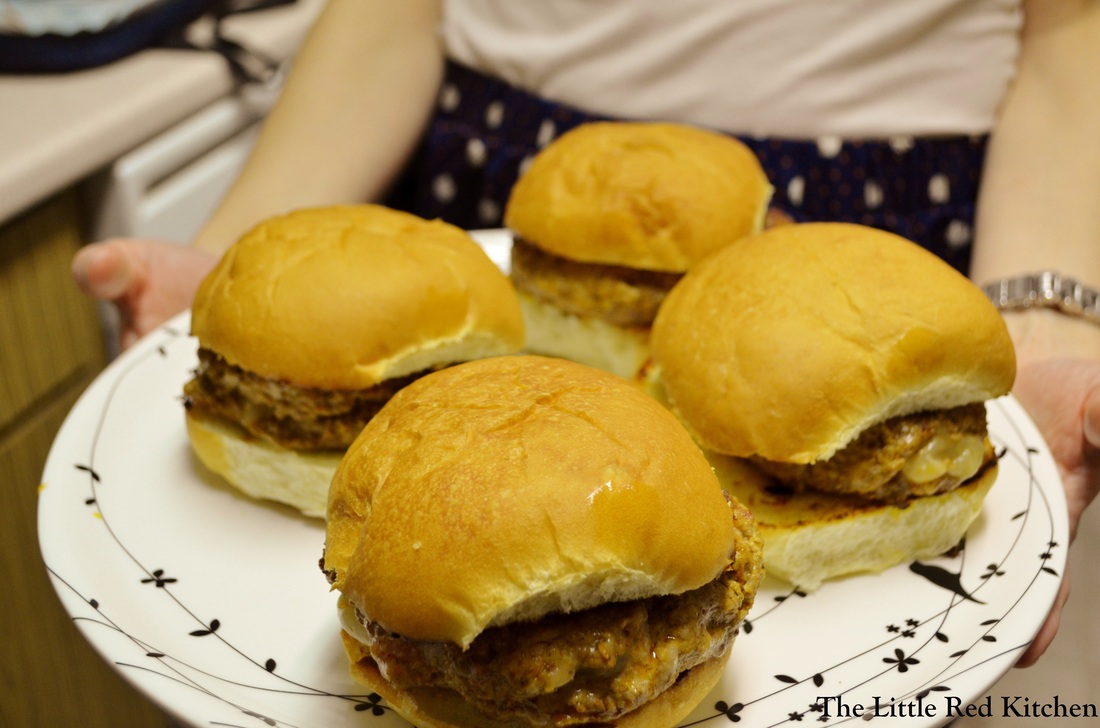
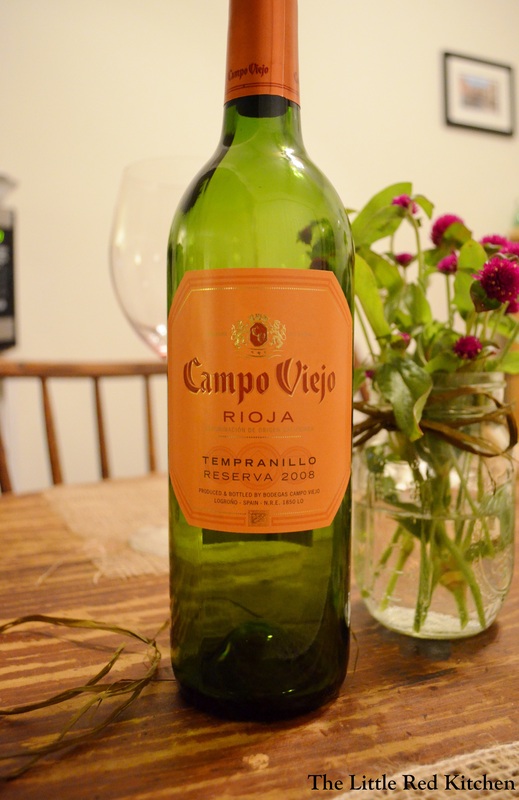
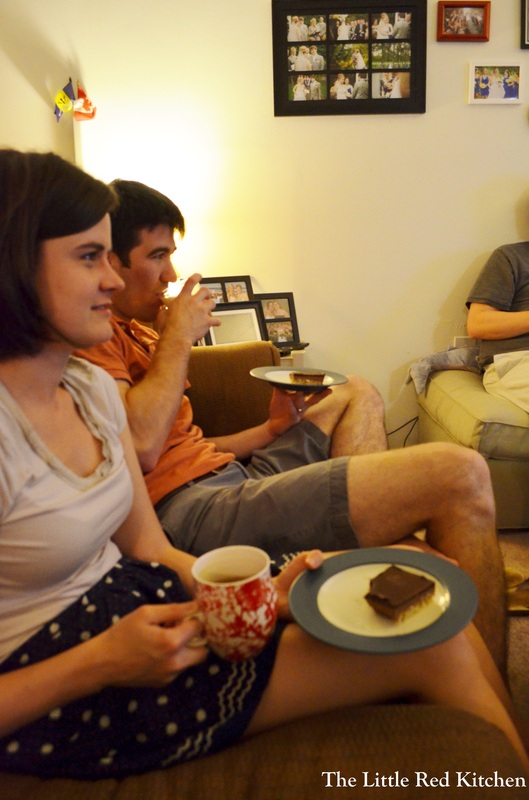
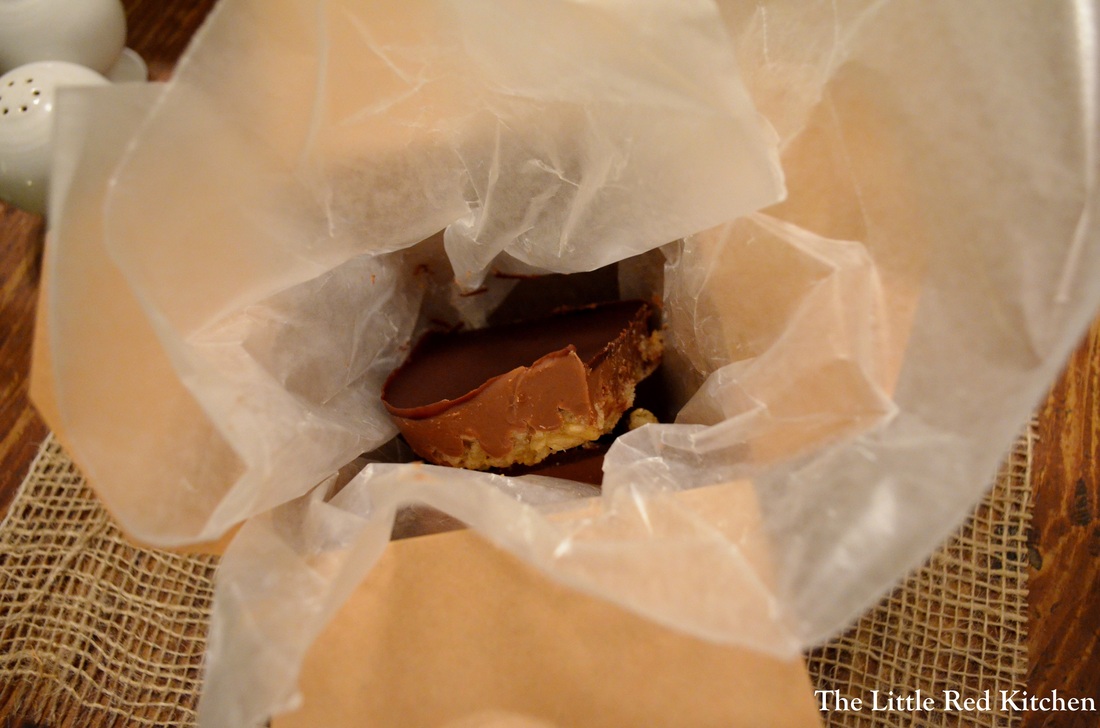
As you can see, I had my side dish made way in advance, and just let it marinate in the fridge for the day, and I had my entire table set too. I was so relaxed by the time company came, and instead of being in the kitchen whipping things up, I could enjoy appetizers and drinks like everybody else! Another tip for dinner parties, let your friends/family contribute! If they are awesome, like our friends Dave and Lauren are, they are happy to bring an appetizer, dessert, or wine with them. Here you can see the remnants of dates wrapped in bacon and stuffed with blue cheese (can you say YUM?) and fresh glasses of Spanish red wine they brought to accompany the meal. And, as you can also see, we're drinking bubbley water! I was actually first turned onto drinking seltzer water by our friends at our last get-together, and with fresh lime juice it is surprisingly addictive! And just a little more special than serving still water. I highly suggest grabbing a 2-liter bottle for company, and leave out a cute little bowl of cut-up lemon and lime wedges. In keeping with the Spanish theme set by our tapas-inspired first course, I made pork burgers with Spanish spices and stuffed with Manchego cheese, which is only one of the best cheeses ever. But even better, I formed and stuffed the patties a couple hours before our guests arrived, put them on a baking sheet lined with parchment and covered them with plastic wrap and left them in the fridge. Literally the only thing I had to do once dinner rolled around was cook them in my nonstick skillet! Instead of making French fries, or even heating up the apartment by baking frozen fries in the oven, I just bought a good bag of kettle-cooked chips and served them in my big indigo bowl. Which leads me to another tip, don't feel like you have to make every little thing from scratch! Use a pre-made appetizer, or buy your dessert from a great bakery, or just steam veggies for a side. The bag of chips was basically almost gone; after all, who doesn't love crunchy, salty chips with their burgers, even if the burgers are a little more high-brow? :) I told my friend Lauren she could bring a Spanish red wine, but don't feel like you have to be that matchy-matchy with your wine pairing. The old rules of red wine with red meat, white wine with fish, are basically gone. Drink what tastes good, and what you know your friends will enjoy too! Something else I love to do, make a big pitcher of one signature drink for the night. I love dessert time, not just because it's dessert, but because it's relaxed. You can retire to your living room and put your feet up. I love offering guests decaf coffee, a wide variety of hot teas, Baileys on ice, more wine, and even milk to go with super chocolatey desserts. Usually friends and family are hesitant to "make me" go out of my way to get them something, but I always insist, and I usually lead by saying that I'm going to have something too, which I think makes them feel better about it! As it turns out, both hot tea AND milk were the perfect complements to these homemade rice crispy bars with milk chocolate and peanut butter filling, and a dark chocolate top. Just to up the cute entertaining factor, I bought a brown Chinese takeout box at the craft store, then lined it with wax paper and sent my friends home with two more rice crispy bars.
My husband and I make it a point to get together with Dave and Lauren for dinner about once every month or two, alternating between houses. We're lucky that they are not picky eaters and enjoy trying new dishes from all over the globe, just like us. It makes it easy to plan a menu and to bring things along when we go to their house. Make it a point to get to know your guest's food habits; then you can put things on the table that you know they will just love.
I hope you enjoyed this post, and hope it has given you some ideas for hosting dinner parties of your own!
~Lauren
P.S. If you want recipes for the burgers, the dessert, the appetizer, or the southwestern black bean salad, drop us an email or leave a comment below!
There's something inherently satisfying about making something yourself, especially if you often shell out (too much) money for someone else to do it for you. Stick it to the man! Make your own clothes (at least once in a while...)! I bought a bunch of knit fabric with the intention of making a dress (or two), a maxi skirt, or a top. It took me weeks to decide on a wrap dress (ah, a classic cut that looks great on literally everyone... examples here, here, and here). It then took me about a week to find a pattern, since I've never used one before (except those I have drafted myself using my own clothes as guides). I found this FREE! and very simple pattern via Craftsy, by Deby Coles. The bonus of this pattern is that it comes as a series of PDFs... simply print, match up, and you're good to go! I started by making a dress strictly by the pattern, and found that while it fit amazingly well, I wanted a cross-over top that I wouldn't have to worry about falling out of (obviously!). This is my attempt at both using and altering the pattern, and I hope it encourages you to try this out for yourself! What I used: - Printed pattern pieces, assembled per the included instructions - 1.5 - 3 yards of four-way stretch knit fabric, such as jersey, rayon, or blends of the two (Yardage obviously depends on desired size: I was able to use 1.5 yards for a size small, with some left over. Deby used 2 yards for a size medium, with some left over. Increasing yardage by 1/2 yard per size seems like a good estimate.) - Coordinating thread - Ruler or measuring tape - Pins
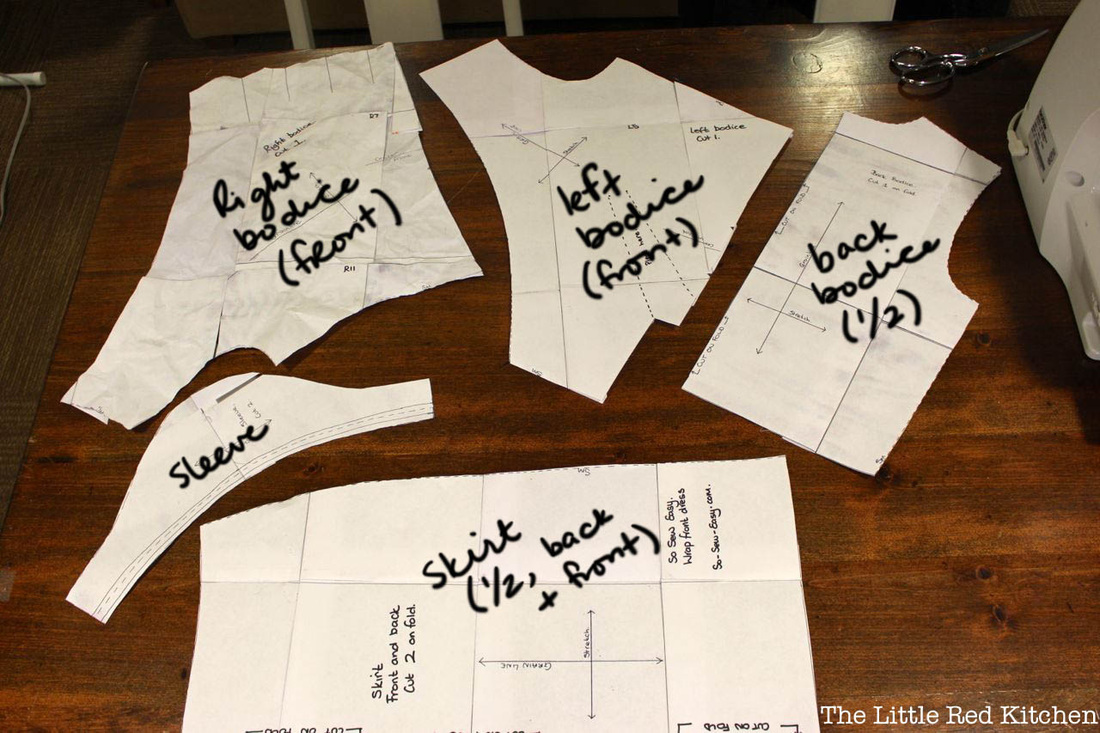
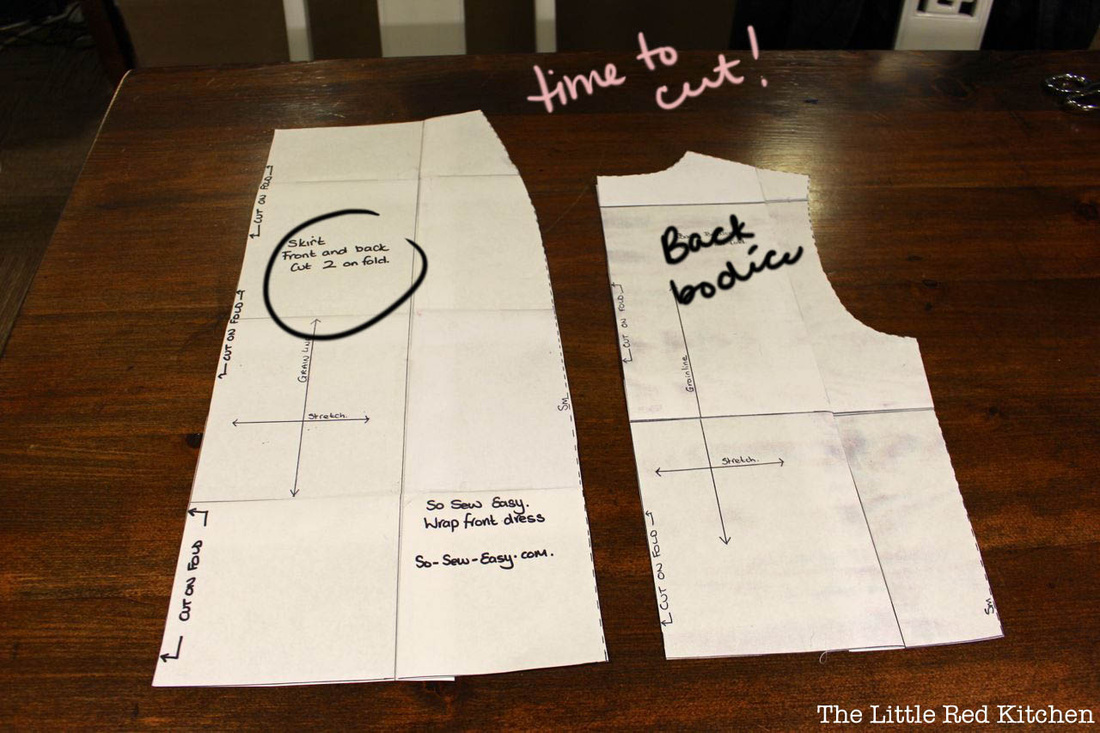
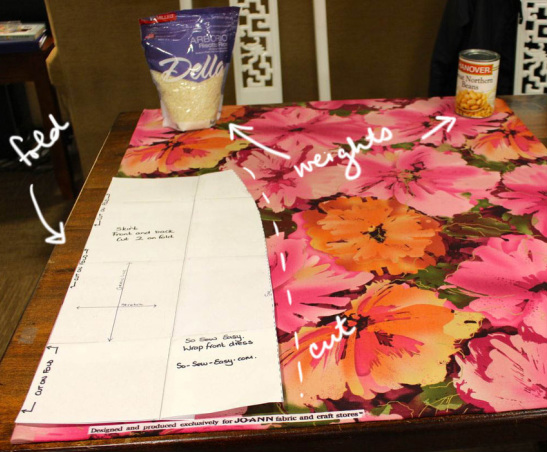
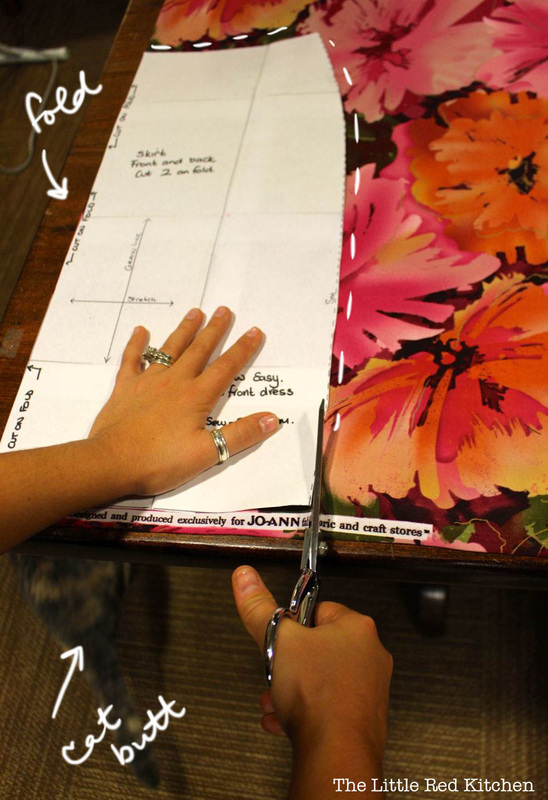
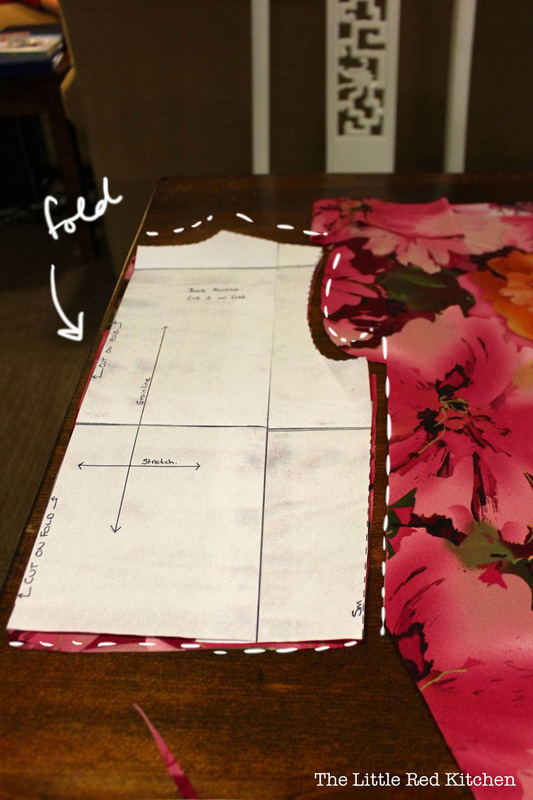
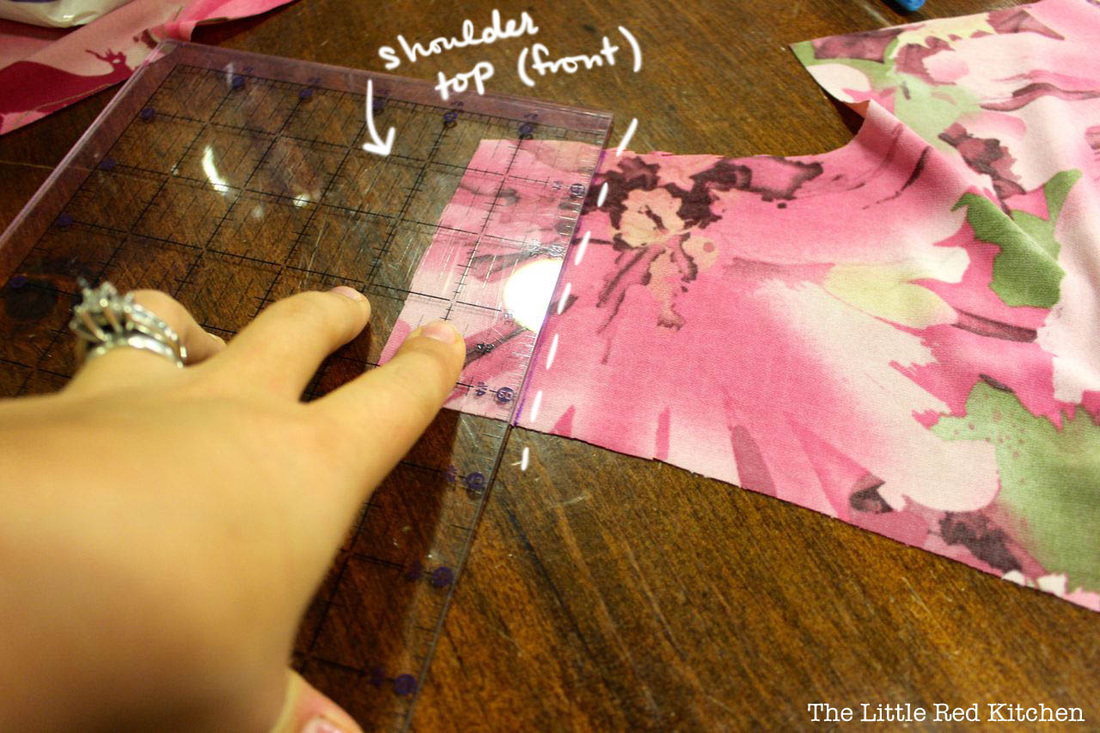
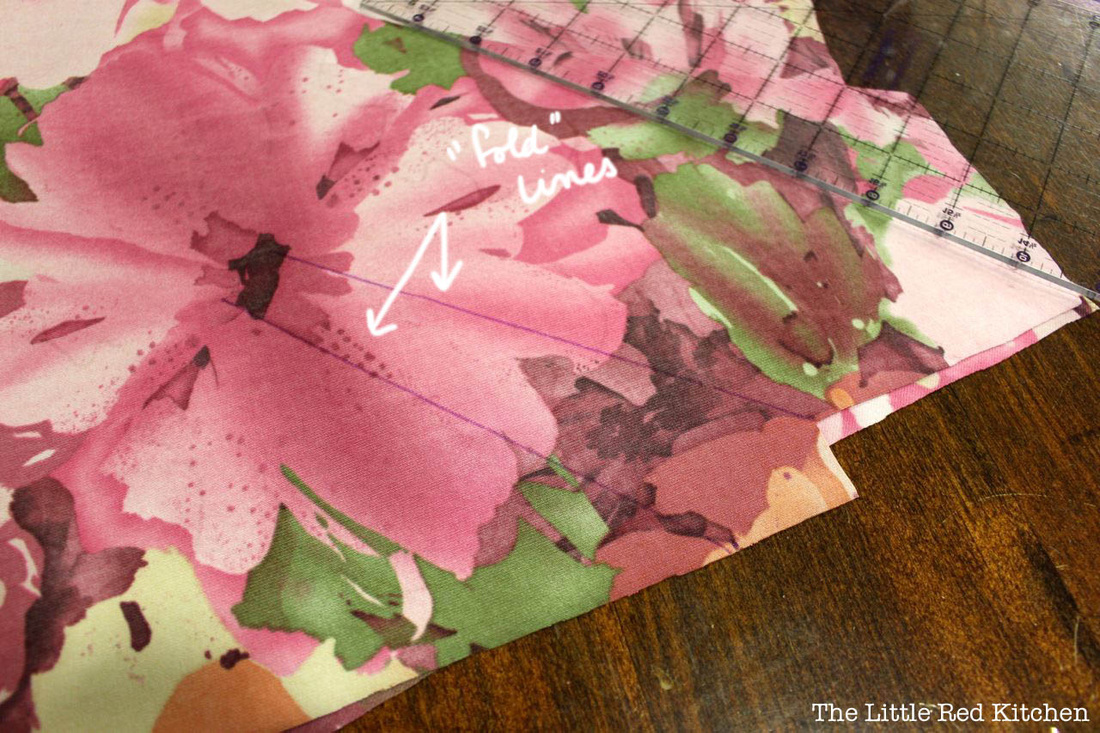
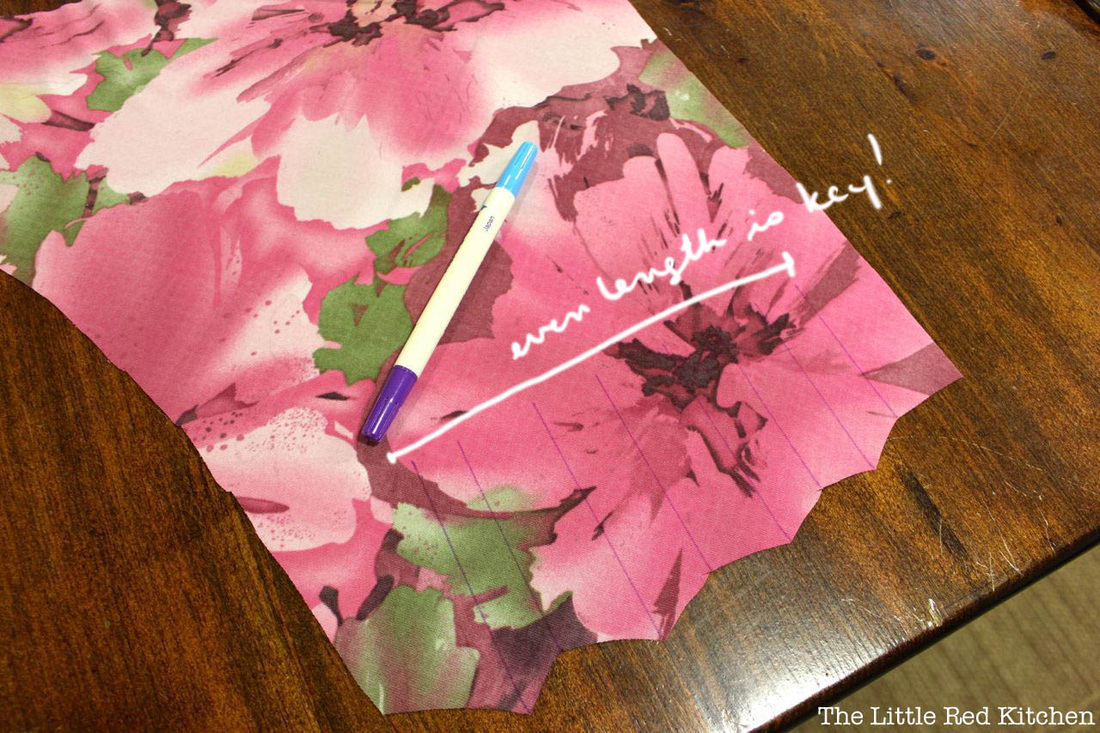
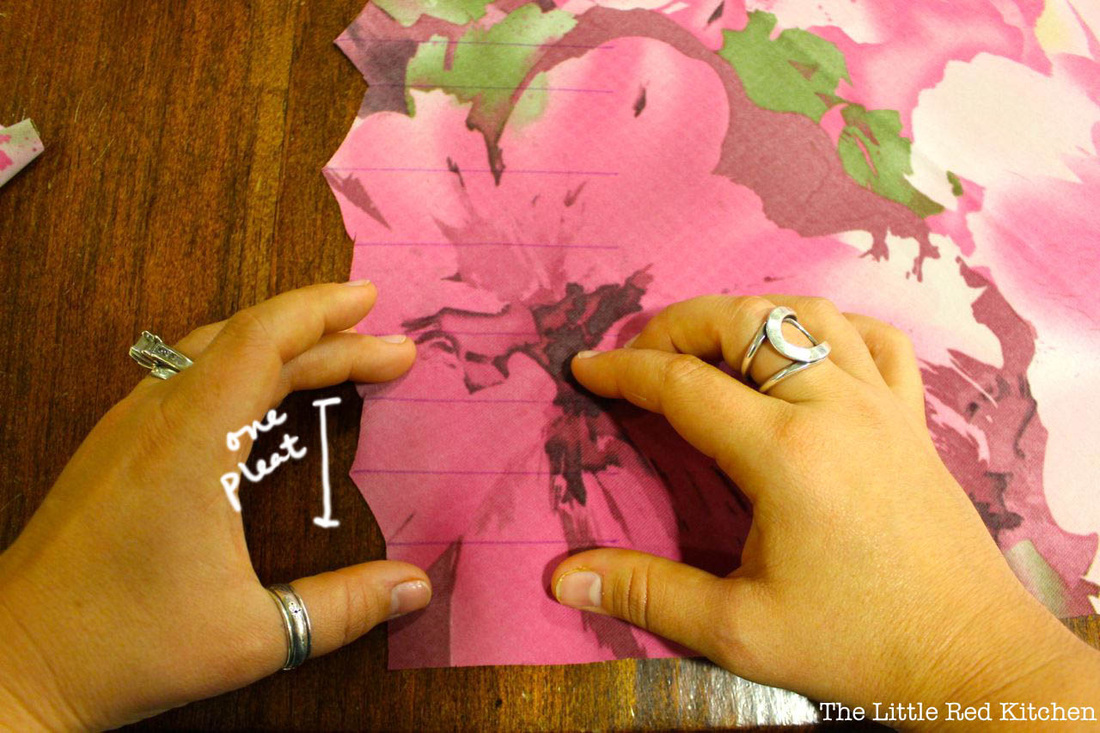
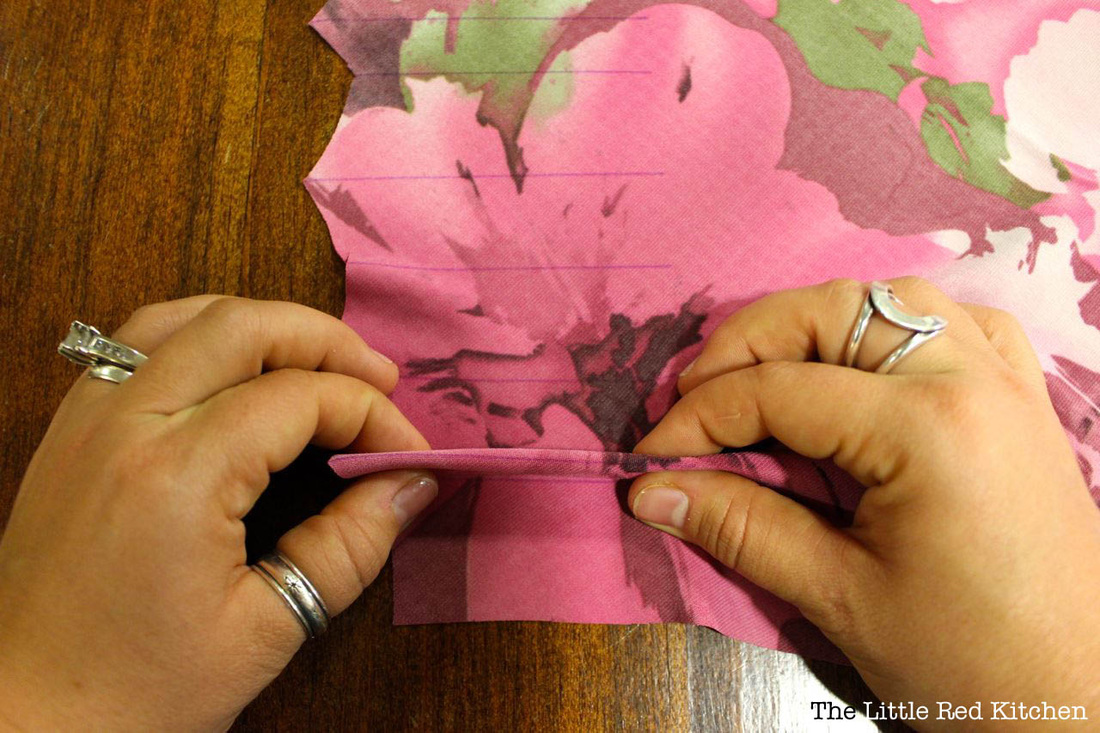
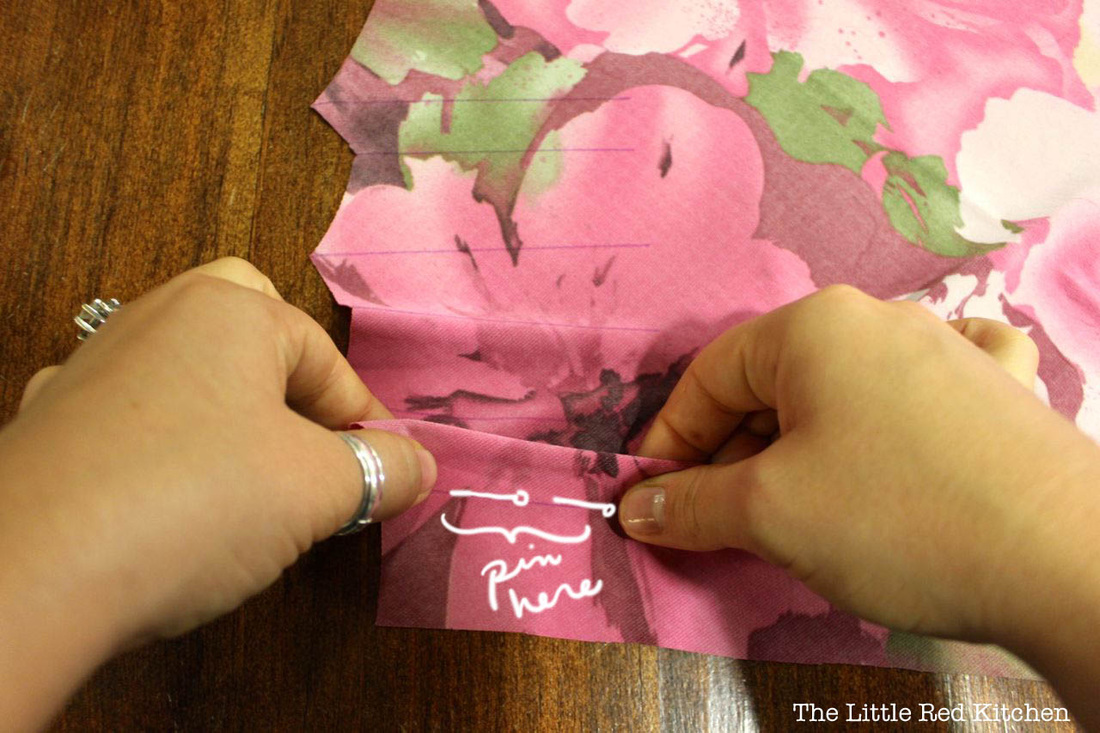
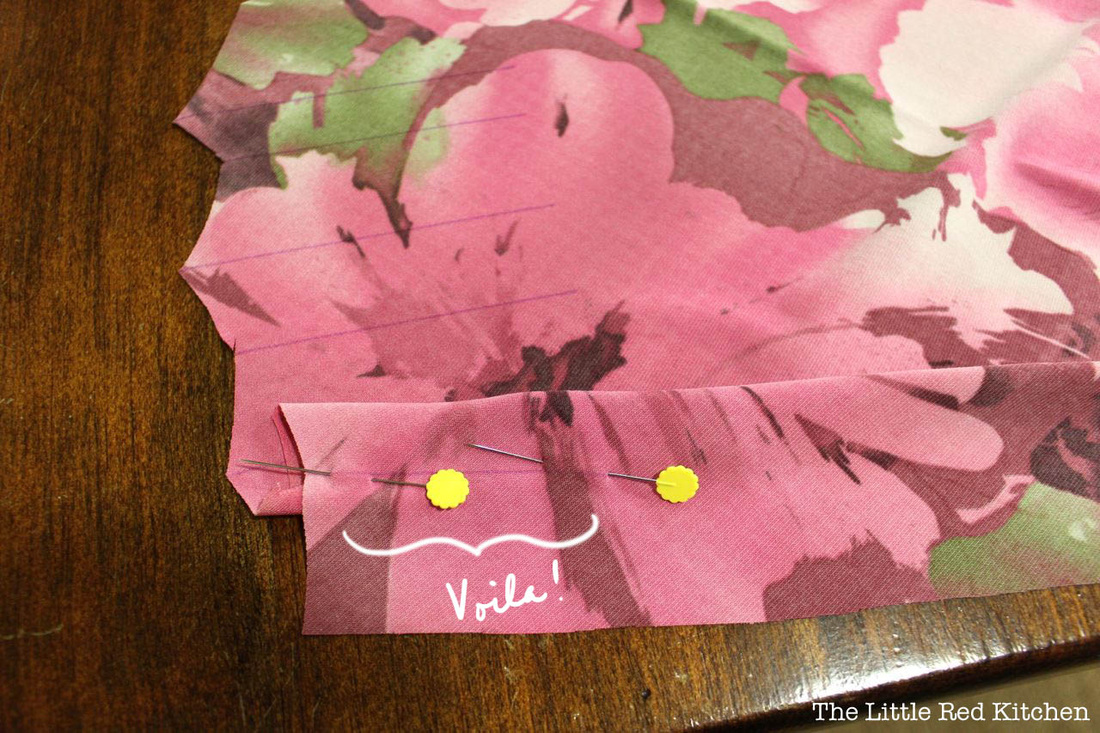
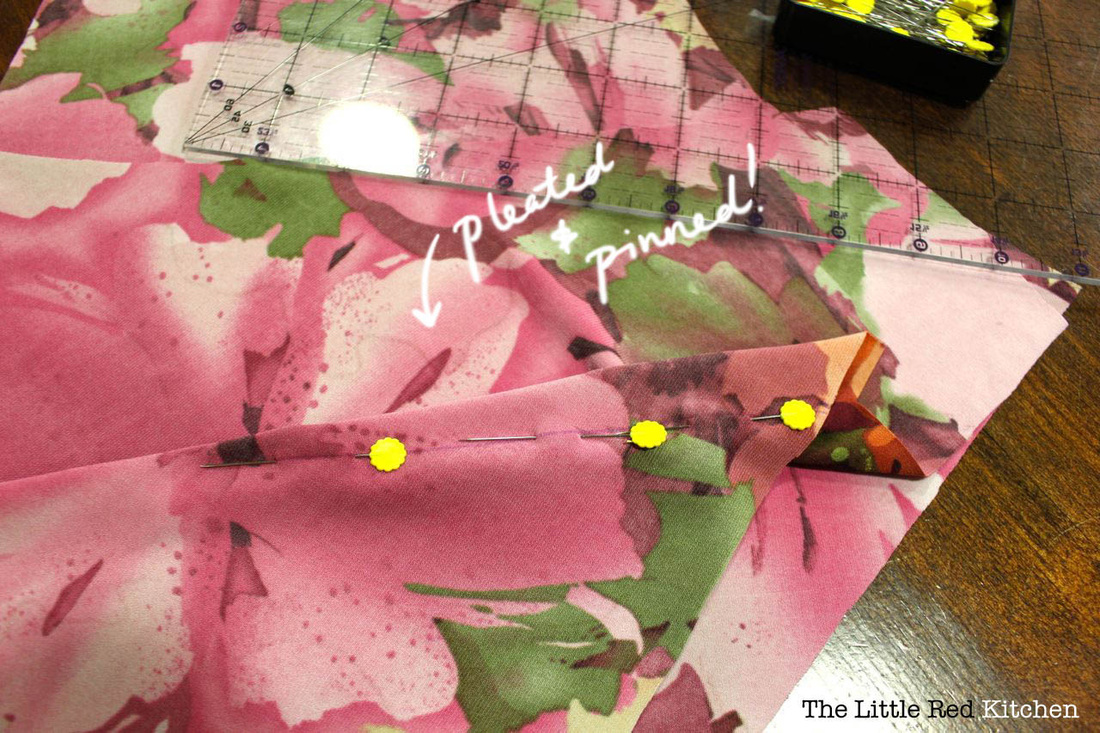
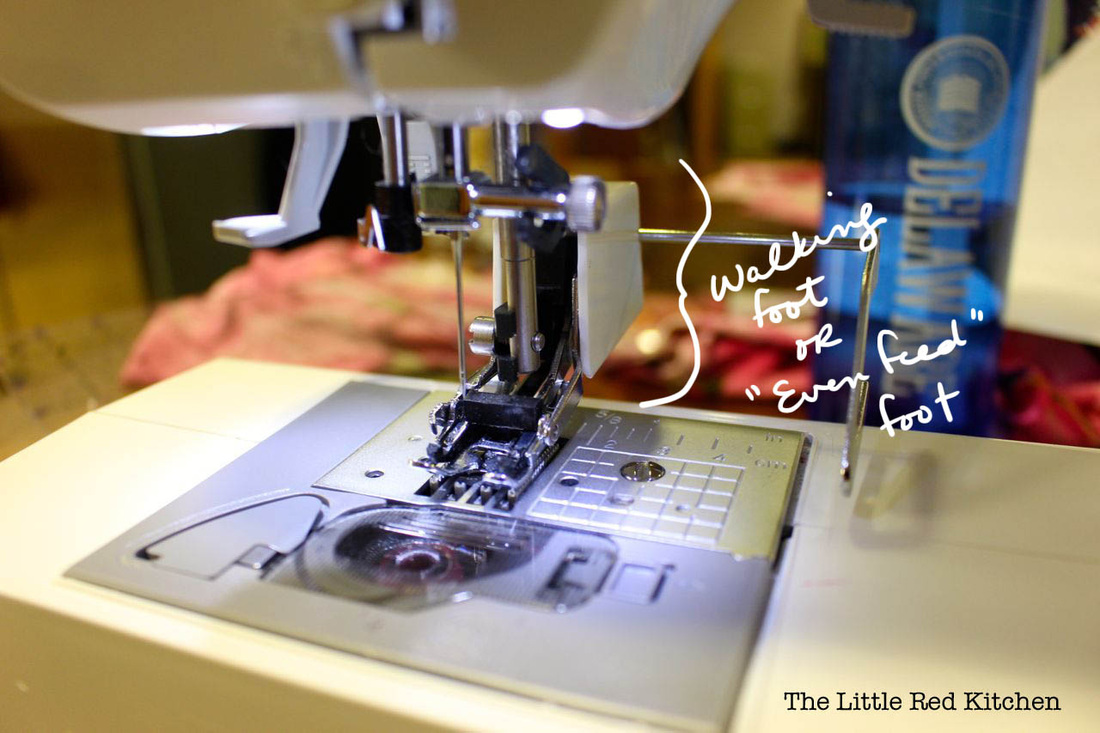
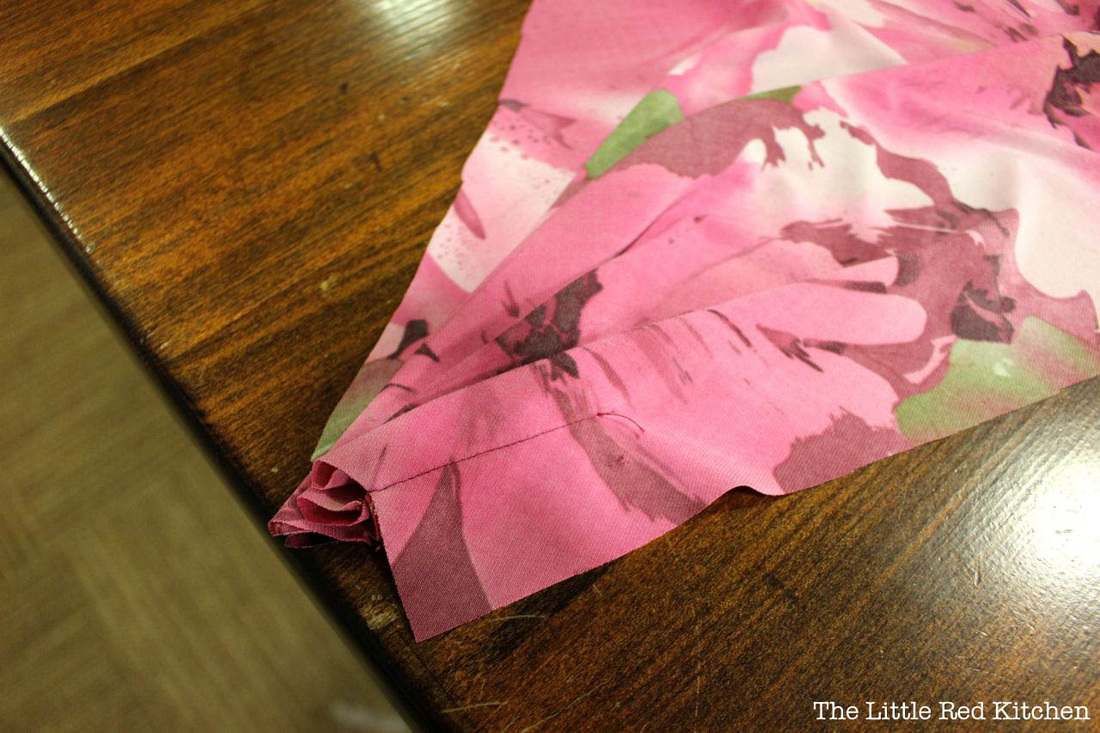
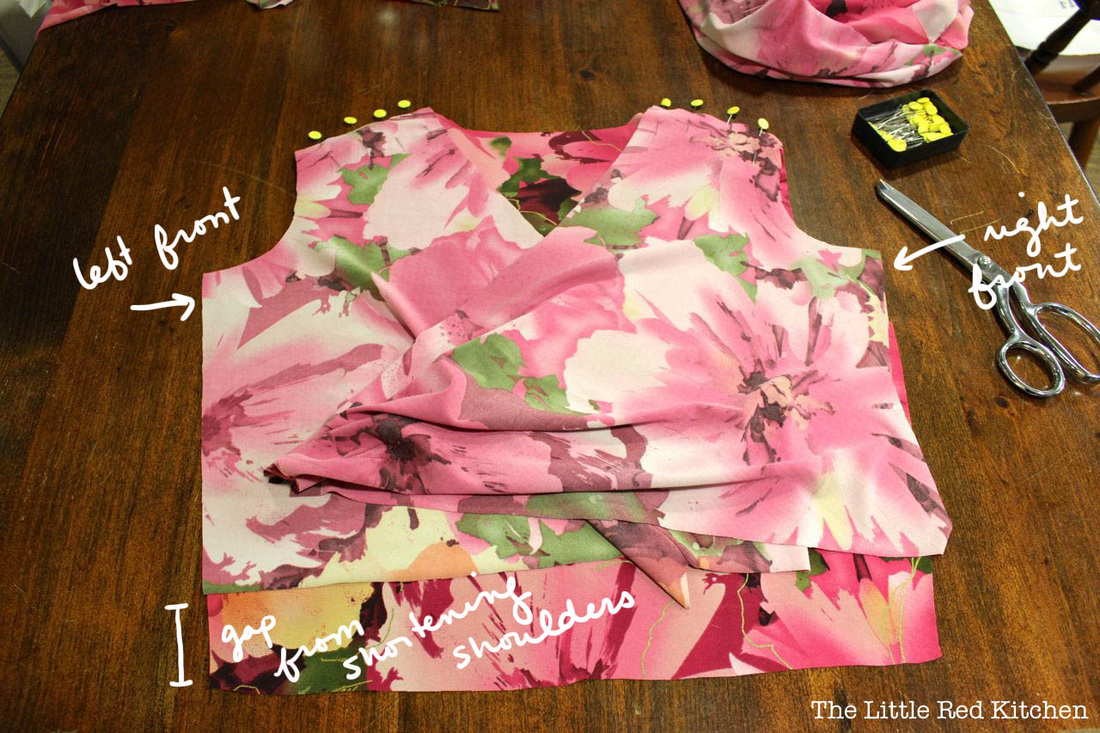
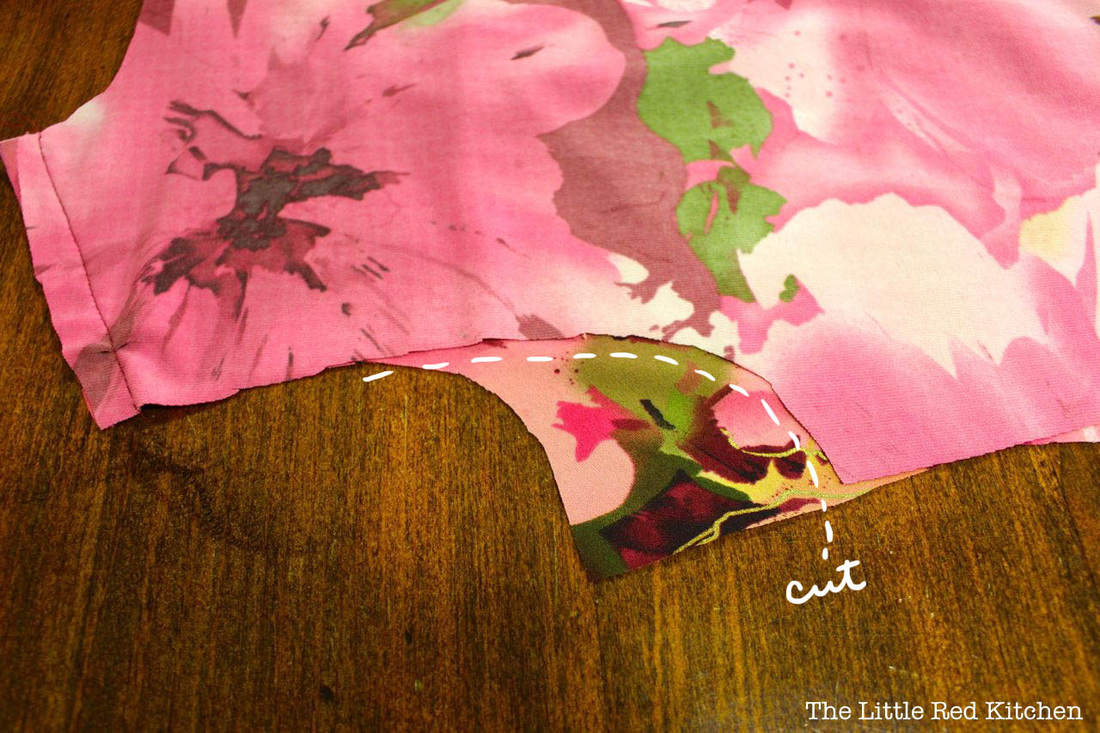
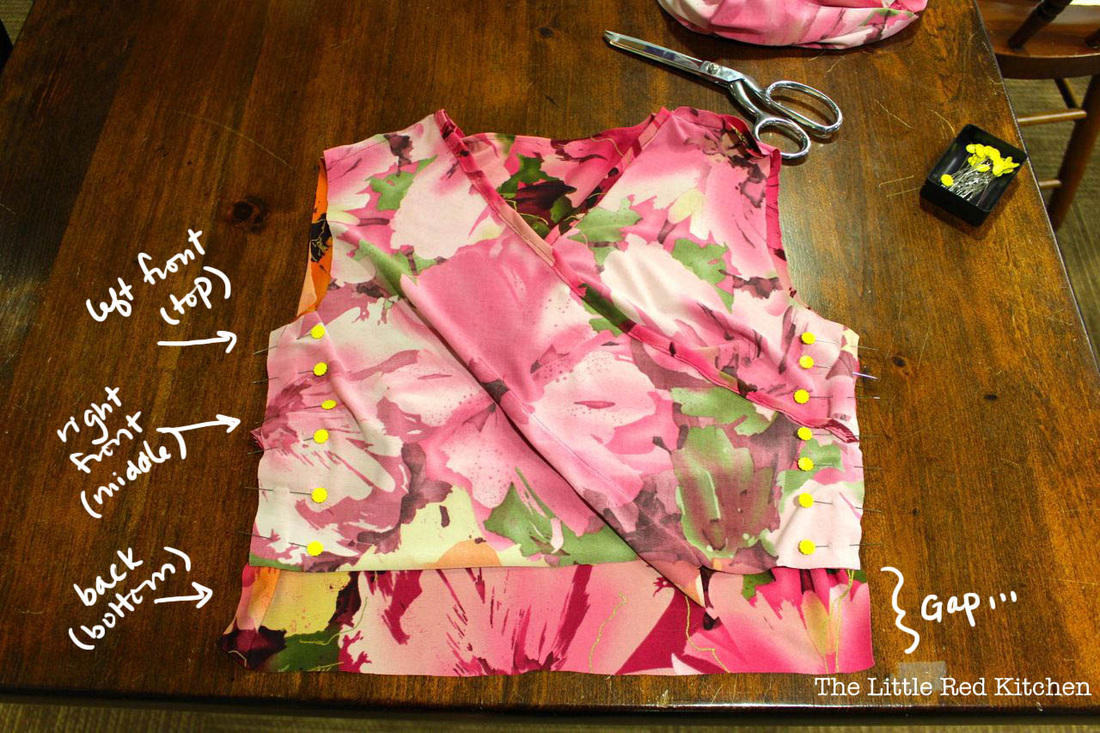
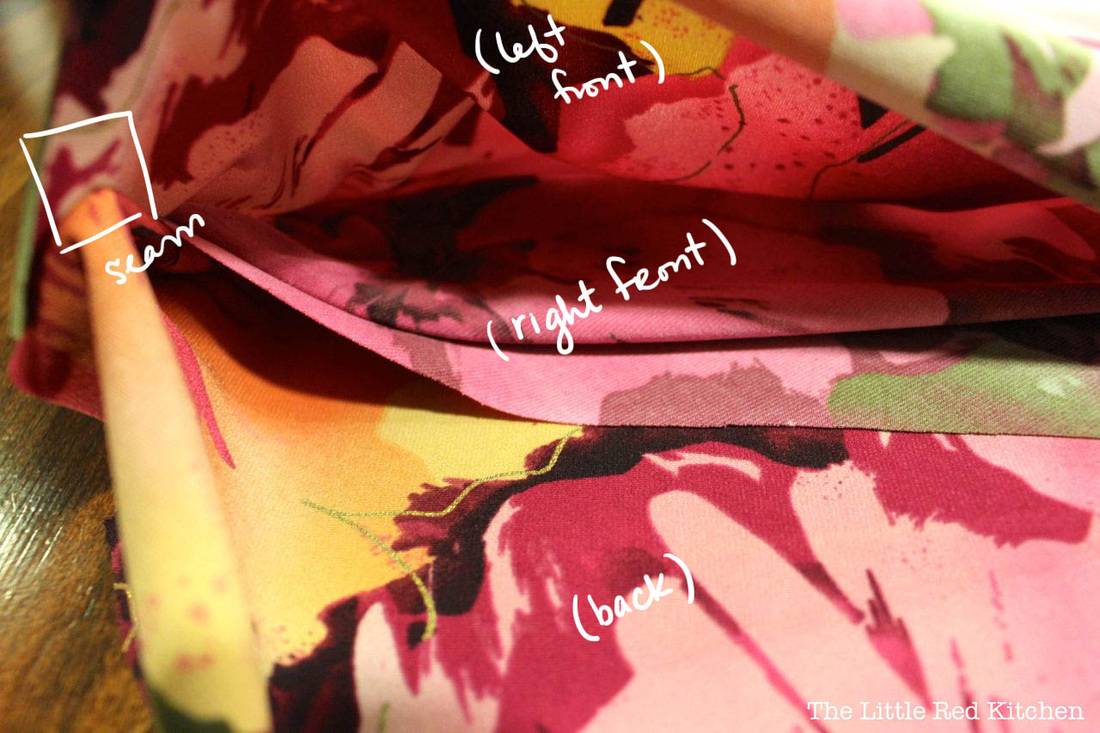
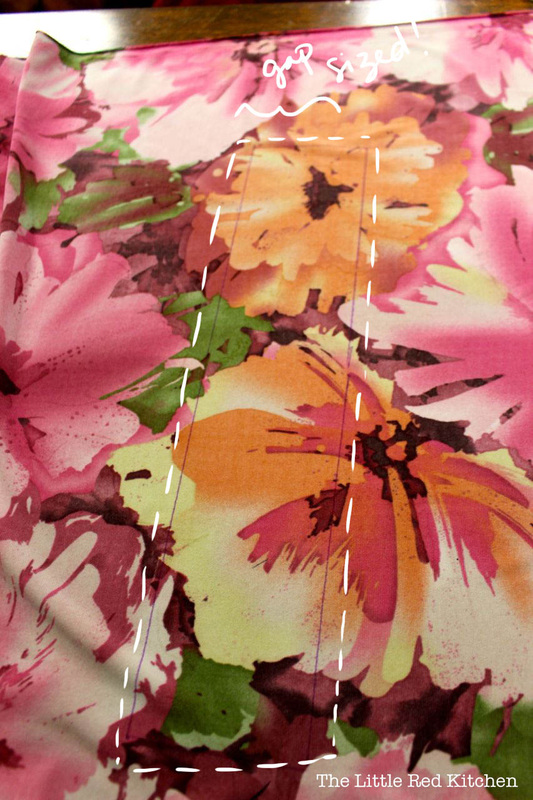
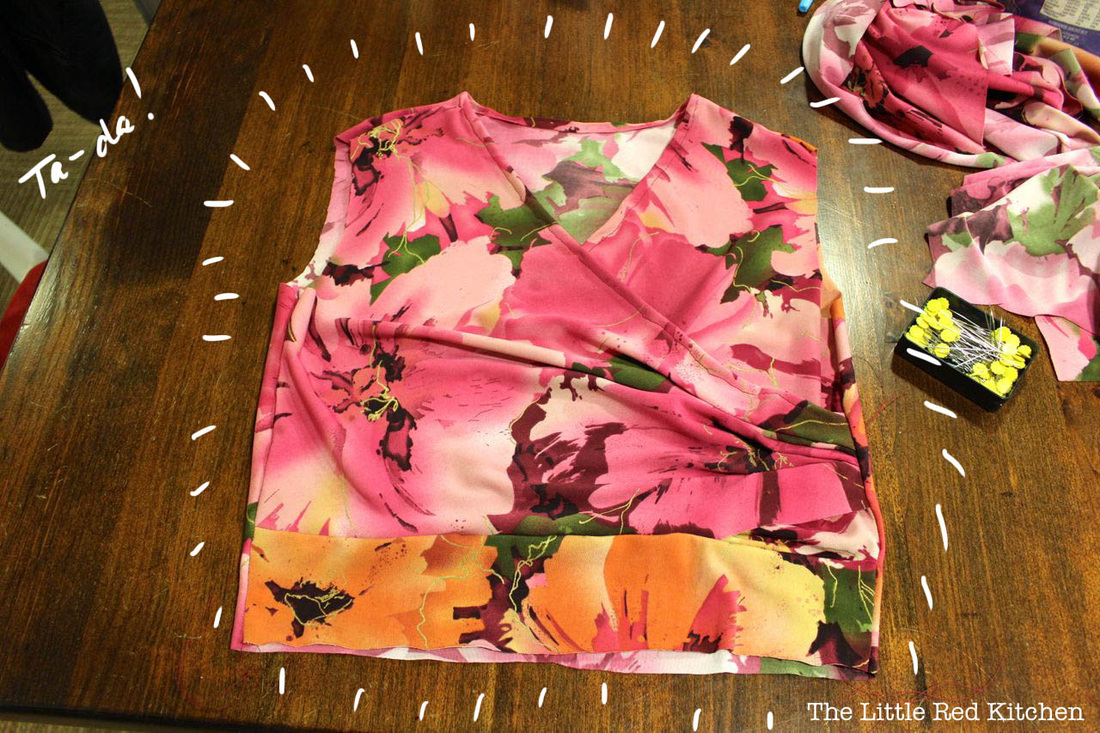
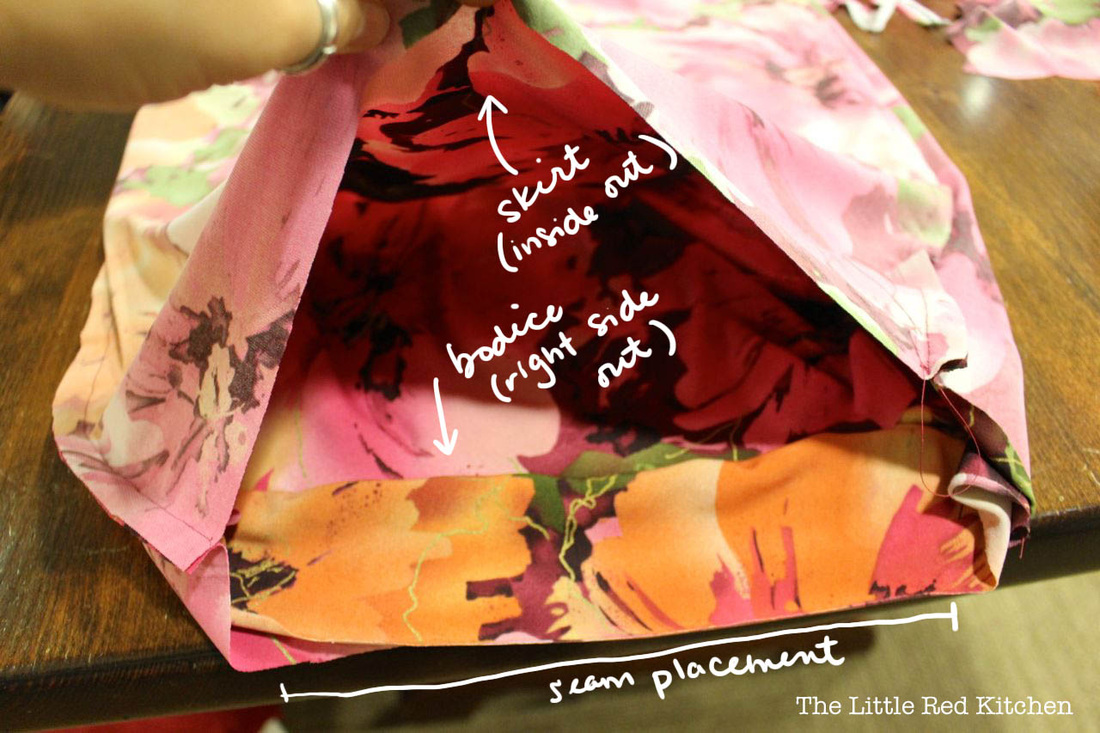
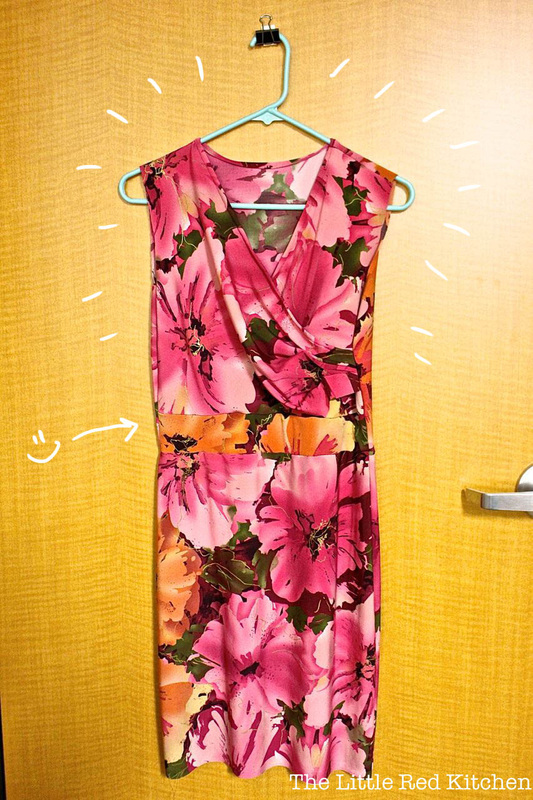
- Sewing machine (preferably with a walking or even-feed foot, but it's not mandatory) - Iron and ironing board I started by assembling and laying out all of your pattern pieces (6 in total): I decided to work with the back bodice and skirt pieces first, since I needed to cut them on the fold (the pattern piece is only half of the desired shape): I laid out the fabric, folded in half lengthwise. It was heavy (more fabric is hanging off of the table edge), so I used "weights" to prevent it from slipping off the table. Then I put the skirt pattern piece as close to the edge of the fabric as possible. You could also use weights to hold the pattern pieces down while cutting! Then I just cut along the pattern. I'm a lazy pinner-- If I can get away without pinning the pattern down, I will totally do it. If you want to be really accurate though, you probably shouldn't be like me. Since I needed both a front and back for the skirt (backless skirt? oh my!), I repeated this process. Then I did the same thing for the back bodice piece. The rest of the pattern was simple, so I cut those out after unfolding the fabric (I only needed one of each piece). Next, I had some alterations in mind. The front of the bodice on my first attempt was really pretty, but it was also casual and a little too low-cut for professional wear. I decided to fix that problem on this dress by raising the shoulder straps on each of the front of the bodice pieces by 1.5 inches by cutting that amount off of the top of the shoulders. When that was finished, it was time to draw the pleats. The included PDF gives great instructions on how to do this, so I just followed along using a fabric marker with disappearing ink. Once the pleating guidelines were drawn, I pinched the fabric like so: ...and the same for the left bodice piece. I know the pins are a bit wonky, but that's okay! I'm going to use my new (and fantastically fun) walking foot, or even-feed foot. This ensures that both layers of fabric are moving under the foot/ needle at the same time (which is really helpful for stretchy or slippery fabrics). With this, I can remove the pins as I go (apparently you're supposed to always do that... who knew!), and follow the lines I drew. Pleating, for me, was the most difficult part of the pattern (since I'd never done it before). If you try this out and are patient, you'll be fine! Here are my finished pleats. They look a little uneven, but that's okay-- we'll sew the end into the side of the bodice anyway. Once both sets of pleats were finished, it was time to attach the shoulders by laying the pieces out, right (patterned) sides together, and pinning the shoulders. Since I shortened up the front of the bodice by cutting the shoulders, there was a gap in the front of the bodice. Now, I know crop-tops and/or high-low skirts are in right now, but I'm not a huge fan! I'll deal with that gap a little but later... Once the shoulders were sewn (using 5/8'' seam allowance), I realized that the armholes were going to need some reshaping too. I lined up the shoulder straps and bodice sides, and simply cut them to match. To finish the edges of the neckline and cross-over portions of the bodice front, I pinned down the raw edges 5/8'' and sewed right along the edge. Since this is a knit, it won't unravel, sooo I didn't worry about folding the hem over twice. (Not the most professional, but hey-- I'm the only one that'll ever be seeing it!) Almost done! Next, I lined everything up right-side together (so, inside-out) to sew the side seams. I made sure that the right hand front bodice piece was the closest to the inside, since it was the one I wanted to see when it was done. I sewed these also using a 5/8'' seam allowance and a straight stitch. Sometimes when sewing stretch fabrics (especially seams that will get a lot of use/stretch), it's recommended to use a stretch stitch or zig-zag. My fabric had a ton of give in it, and this was large enough to fit me without too much stretch, so I didn't use them. Here's another view of the bodice placement for sewing the sides: Next it was time to deal with that pesky gap along the bottom of the bodice. I thought it would be cool to add a waistband from the section of the fabric that contrasted slightly with the rest of the bodice. This would help define my waist AND make sure that the skirt could attach to the bodice evenly. I cut out a section that would fit the gap I'd left (below), and sewed it along the bottom of the bodice. Then I turned the bodice right-side out and... Next (not-pictured), I put the skirt pieces right-sides together, pinned up the sides, and sewed them using a 5/8'' seam allowance. After the bodice adventure, it wasn't that exciting! I left the bodice right-side out, and slid it into the inside-out skirt, so the waistlines matched up. As you can see, the bottom edge of the skirt was above the top of the bodice (since it would come down and hide the seam when I was finished... I hope that makes sense)! Once that seam was finished, I was all done! I still have to hem the skirt bottom (maybe... it's a knit so, again, it won't unravel, but it does look more professional with a finished edge). I chose not to add the sleeves, so I'll have to either put them on later (or finish the armhole edges), but I'm really happy with my work for now. And just look at that nice, contrasting waistband-- for a mistake, I'm pleased with how it turned out. - Kaitlin
As I'm sure I will mention in many a post, I live in a fairly small apartment, with another human being, so a lot of modifications need to be made in our space in order for it to be livable and happy. For instance, as much as I may or may not want to indulge in that grown-up female urge to decorate the heck out of every square inch, I can't. So, what is the answer? To the walls!
I can cover every last bit of my wall space in all sorts of things if I want to. Now, I don't want to, first of all because I have minimalist inclinations, and second of all, because I'm picky. I don't want just any old thing that anybody is bound to have hanging up in their house, and I want to be creative to any extent that I can be creative. And a few years ago, I discovered postcard art!
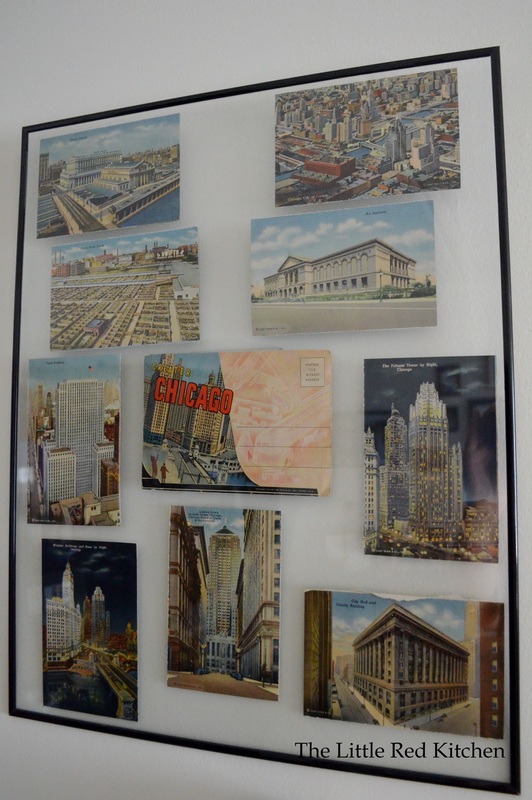
My husband and I love to travel and explore new places together, so when Doug had a birthday a couple years ago, I found a set of vintage postcards from Chicago on eBay (we had taken a trip there recently), slapped them in a frame, and bam! He loved it, and now it hangs on the wall in a home we share. Even better, the postcard set cost about three bucks. All of this being said, this post isn't extravagantly DIY, more of an idea I want to share. There are postcards out there to suit every taste, and unless it's some rare collector's edition, they are usually dirt cheap. Here are a couple of my favorites: From Etsy, 25 vintage English postcards for 11 bucks? Yes please and cheerio. (Etsy listing photo from the shop of burstsofcreativity)
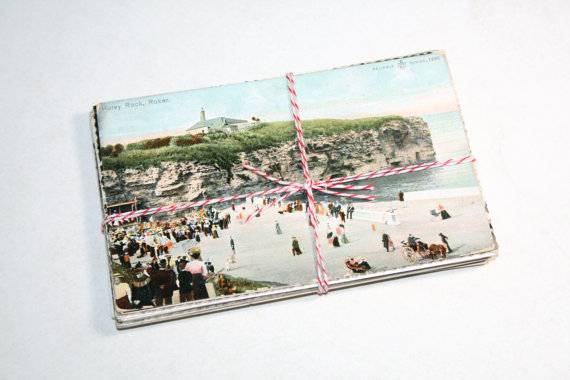
Postcards used to be art all on their own back in the day! Like this one, from another wonderful Etsy shop, pecanhillpostcards: From the Victorian Era, "Love on a Balcony" is actually postmarked, 1908, sent from Danville, PA! You can buy 'used' postcards, which I think is really cool. Also, I smell wedding décor! Somebody out there needs to get on this, and then send me pictures of it.
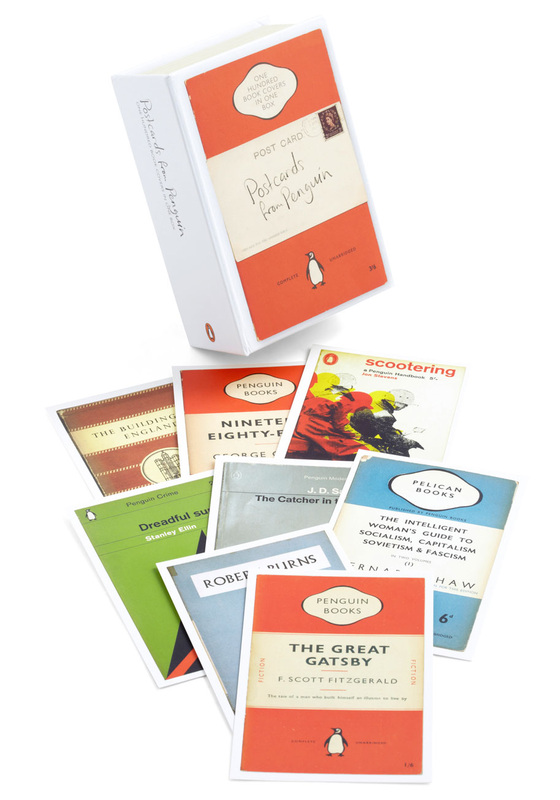
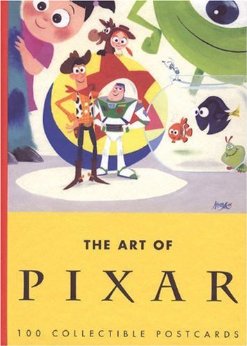
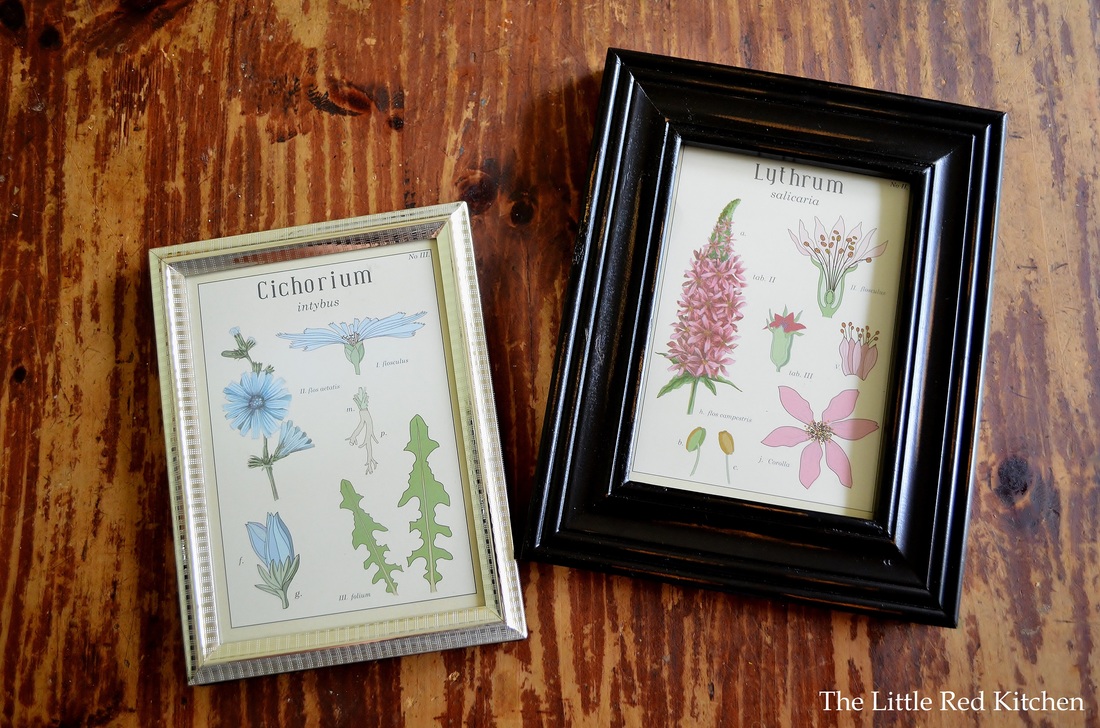
There is literally no reason why I don't yet own the Postcards from Penguin: The photo is courtesy of Modcloth, and while they are no longer available there, you can hop on over to amazon.com and snag the set of ONE HUNDRED for $17.49. And while you are there, you may want to check out these: Cant. Get over. The cuteness. Etsy and Amazon are just a few great places to start. Also check out eBay, not to mention vintage and thrift shops in your area. And, unlikeliest of sources, for my recent project, I bought a pack of 5 5x7 cards inspired by vintage floral postcards from Ikea for 99 cents. You never know where inspiration will find you. Mismatched frames are all that's left to buy.
Happy decorating!
~Lauren
My husband and I really came to enjoy wine somewhere around the time we got married, almost two years ago. We liked the fact that it was a hobby we could share, and quite easily, because what's easier than drinking wine? We began to learn more about it, to discuss what we liked about certain wines (bright, citrus) and what we didn't like about others (cough medicine with alcohol in it). Despite the high snobbery level that is associated with those who enjoy wine, there are actually very few right or wrong answers when it comes to drinking it. The only thing that is in wine is grapes, so whether or not you taste raisins, or blackberries, or coffee, or pepper, or grass, when you drink it, you're right! Because none of that stuff is in there. Make sense? You can train your palate to learn how to detect all the different nuances and subtleties, but nothing could be more subjective, because none of that stuff is ever actually in there! (When we were in Napa Valley for our one year anniversary and I picked up on the distinct flavor of maple bacon in a hearty bottle of red, I think I cried tears of joy.)
But perhaps the thing we like the most about wine is the associations we have with it. The bottles we were saving up before my wine journal idea were from our wedding night, our first Christmas as a married couple, the wine I cooked with when we got engaged, not to mention tons of other little familiarities, even as simple as, oh we drank that pinot noir when I made that steak dish you really liked. The empty bottles in our apartment were starting to pile up and I knew I wanted to think of some way to preserve them but didn't know how. DIY cork crafts abound on the internet, but how would saving a bunch of corks that look exactly alike also save my memories of their bottles? I came across a few label crafts, but they were all too short term; I didn't want to stick 4 or 5 in a picture frame, I wanted to create something that I could continue to build on, forever essentially! My husband's parents literally wall-papered a wall of their house with wine labels. So, after carefully analyzing these two extremes, I decided to make a wine journal for my wine labels.
The typical wine journal that exists is just for writing in. You can buy them, and you just fill in the name of the wine and your tasting notes on them. But let's be honest; while I don't fall into the trap of buying wines for their labels, they are the most beautiful part of the bottle, besides what's inside. Also, while I care about tasting notes to some extent, I also want to remember what was special about each wine, what I served it with, who I drank it with, who gave it to us. Those things are more important to me than any 'tannic notes' could ever be! That being said, below are the step-by-step instructions for making your own wine label journal!
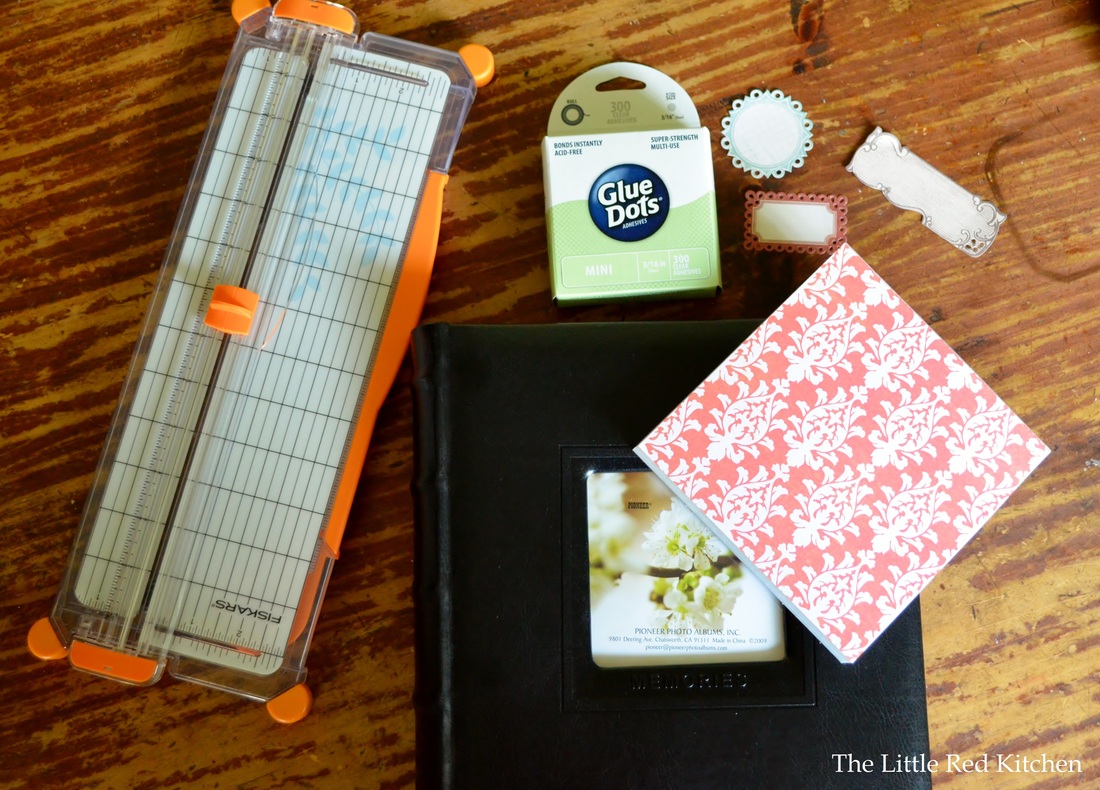
Materials:
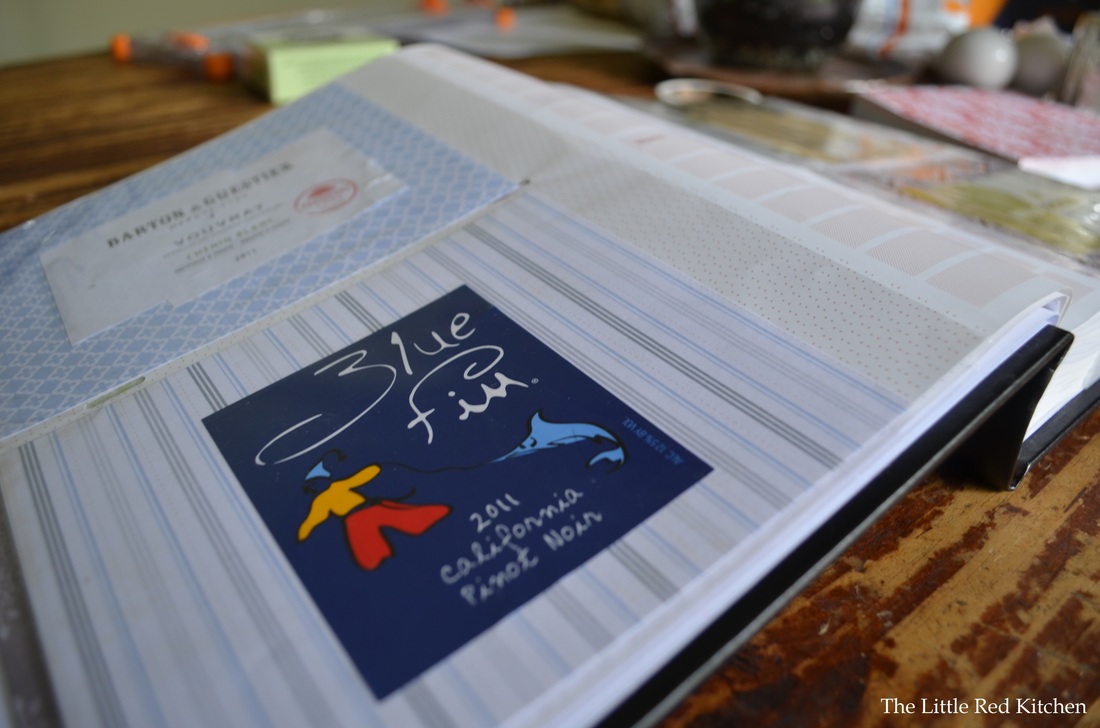
A photo album that holds 4x6 photographs and has a 'memo' or notes column
6x6 squares of scrapbook paper, patterns of your choosing
Adhesives (you can see below what kind I use)
Scissors (or if you couldn't cut a straight line to save your life, like me, a paper cutter. cheap little ones will only cost you about $10, but they get the job done.)
Scrapbook labels (again, of your choosing) Step 1:
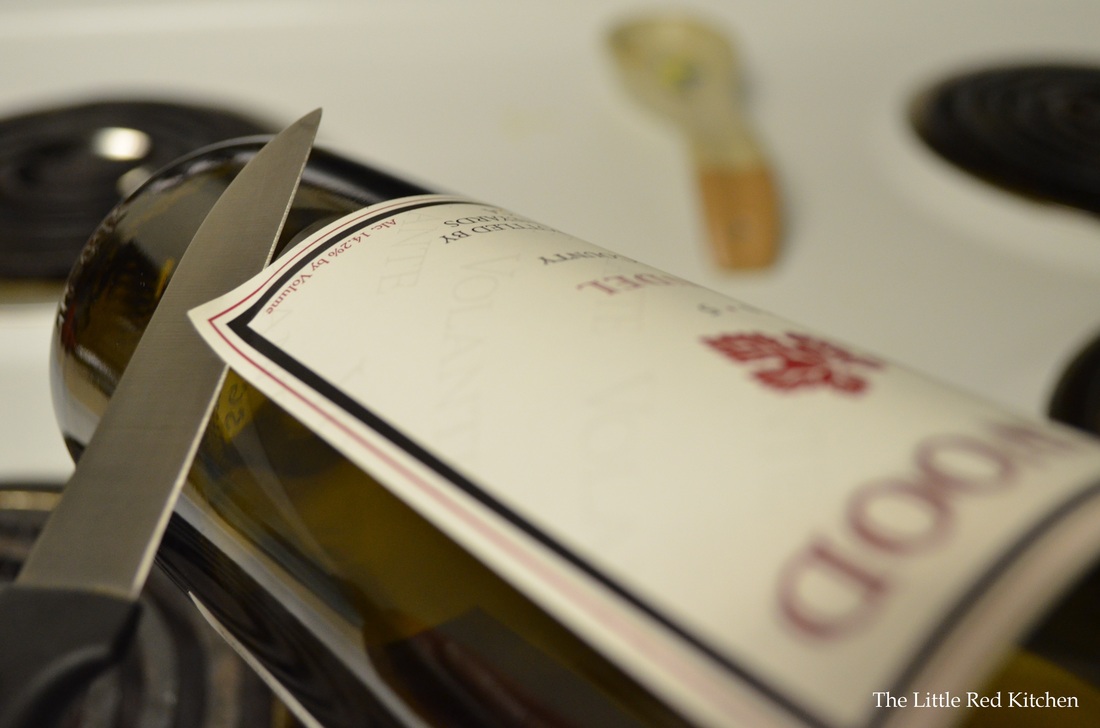
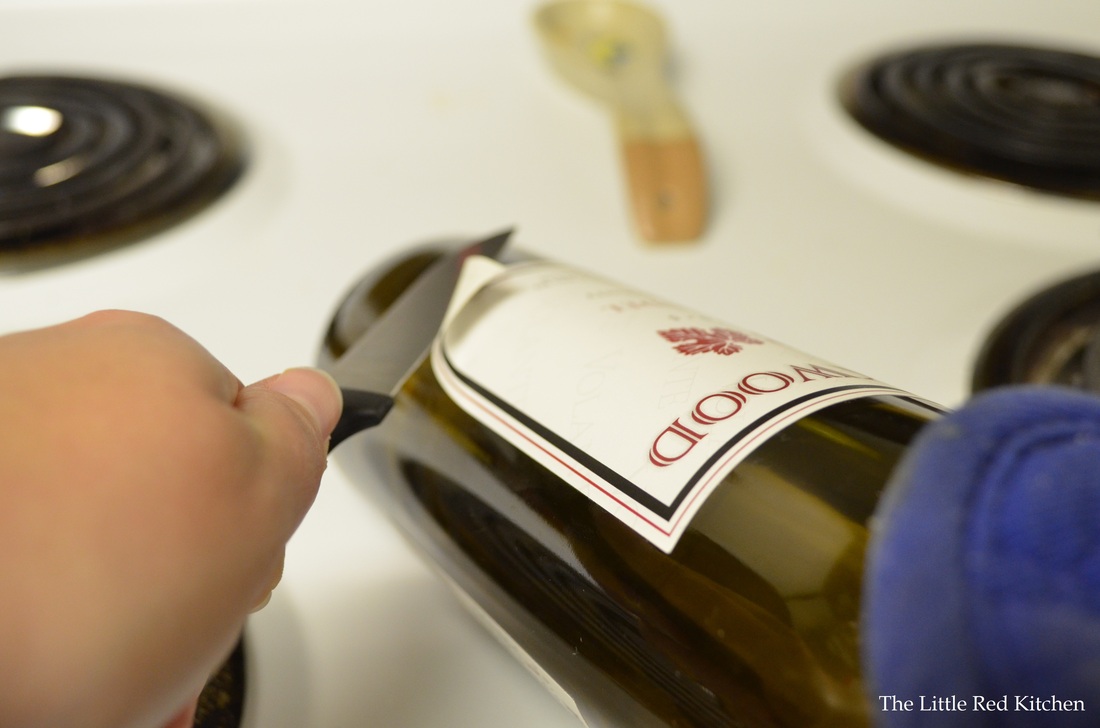
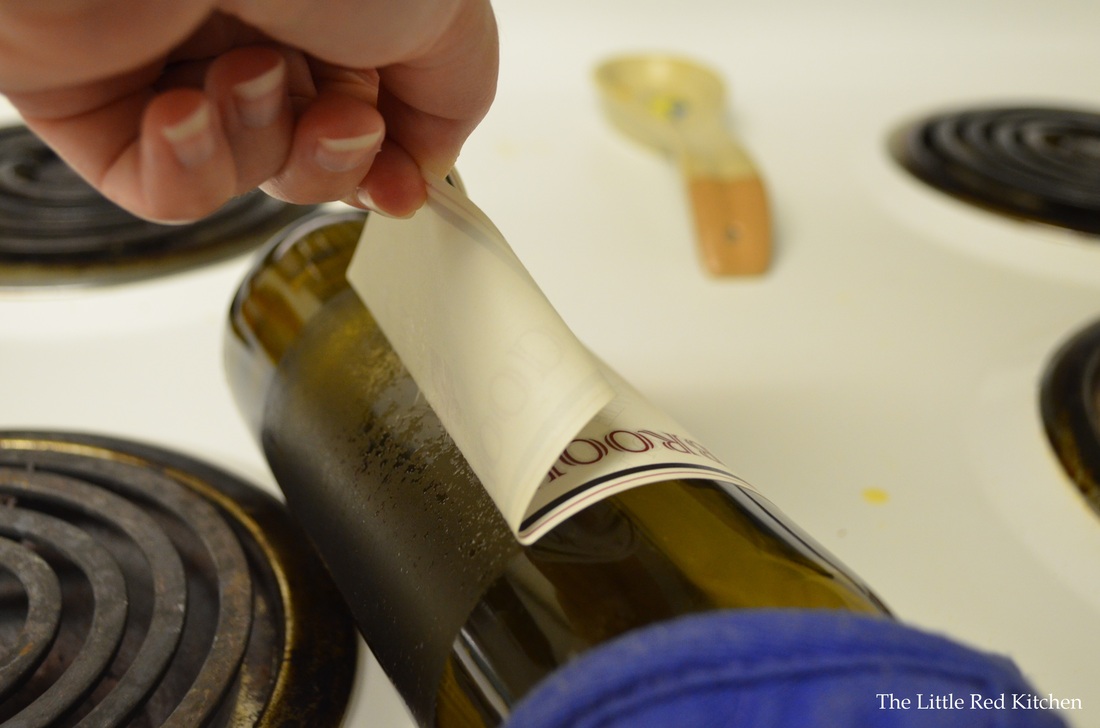
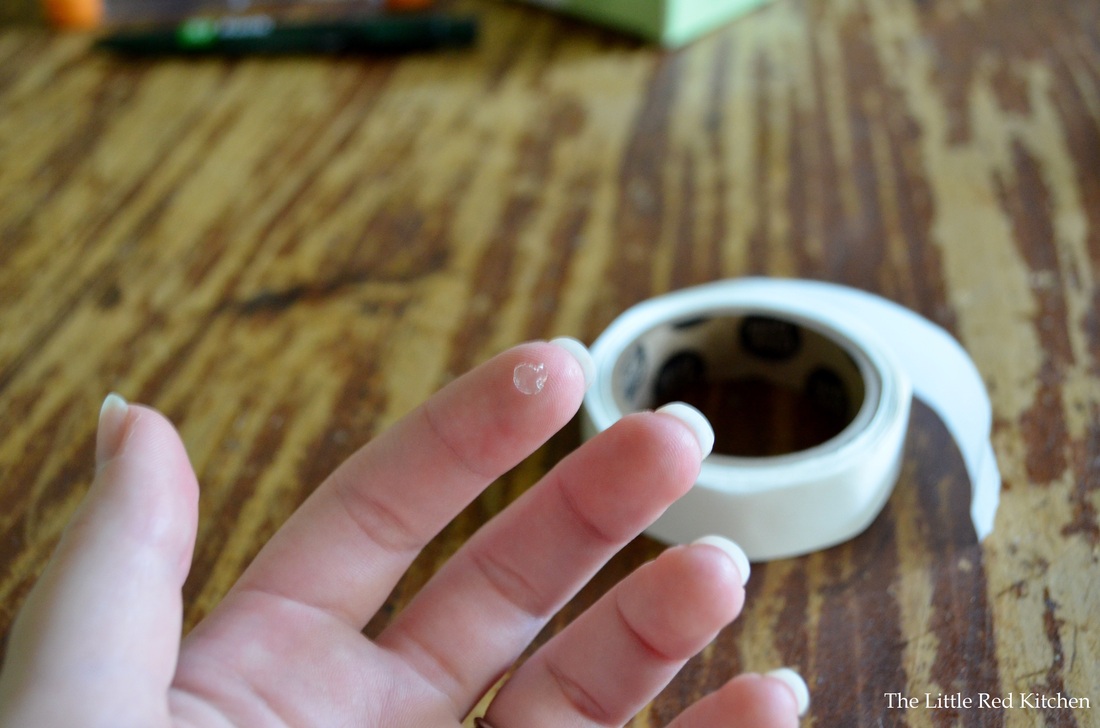
Heat your oven to 225 degrees, and simply stick the bottle on the middle rack. Leave it there for anywhere from 10 to 15 minutes. You are basically heating up and melting the glue. You can do multiple bottles at once too. Stick it in label up and neck of the bottle facing out; makes it easier to grab when you need it. After the time has gone by, get the bottle out and, holding it by the neck with a pot holder, test the corners of the label with a paring knife to see which one is loosest. When you've found that corner, carefully wiggle the paring knife between the bottle and the label...the operative word is carefully. I've lost a couple labels because I got too eager and ended up ripping right through the paper. Even if it seems like the label is coming off easily, don't rush it! Once you get to a point where there is enough label sticking up, you can go ahead and grab onto it and slowly peel it off by hand (the label itself is not too hot to touch). Disclaimer: Sometimes, the labels just won't come off. I've left bottles in the oven for 30 minutes before, and they just won't come loose. On the one hand, applaud yourself for buying a wine that is of good enough quality that the glue they used is so darn efficient. On the other hand, it's a lost cause, and you'll probably have to just toss the bottle, label and all.
Step 2:
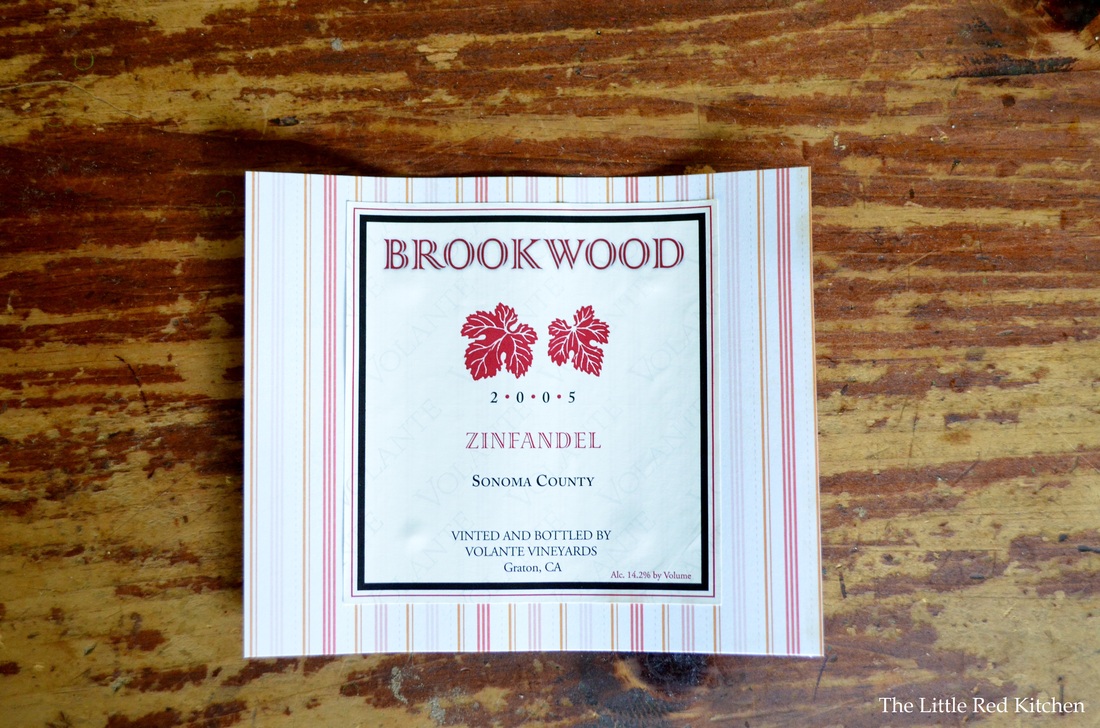
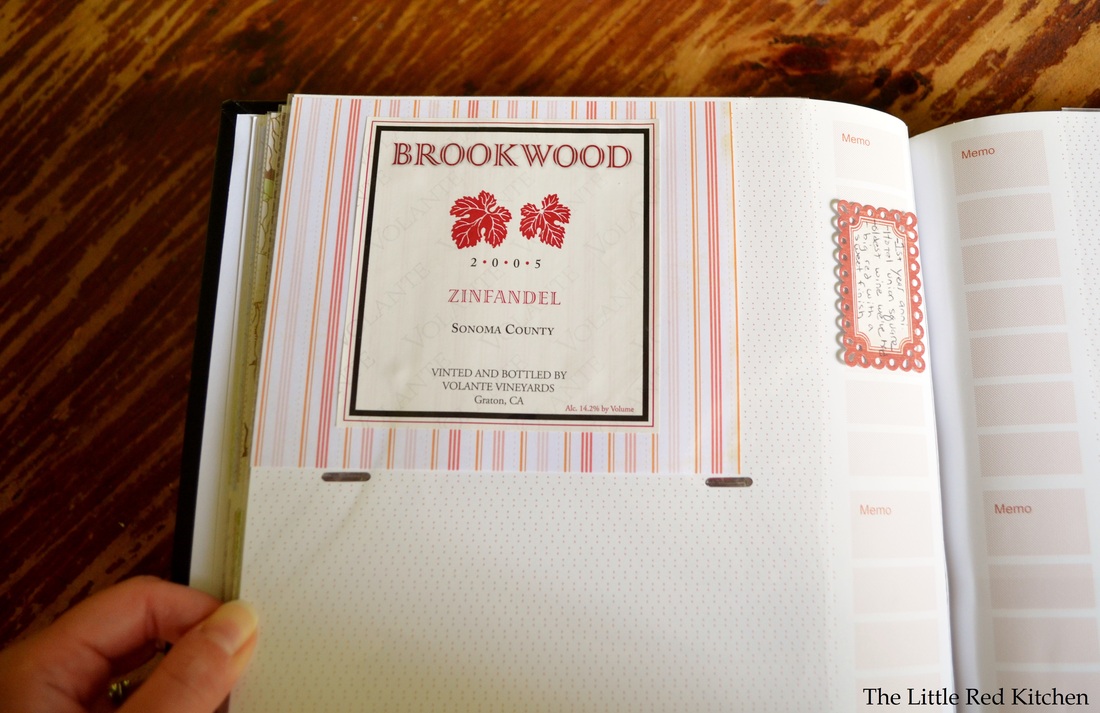
Now that you've got your label off, you are ready to start your wine journal! First, cut a 1-inch strip from any side of the scrapbook paper (remember, math majors, it's a square so it doesn't matter what side you cut from). Now it will fit into a 4x6 photo slot. Trust me, you only need to cut an inch off, it will fit perfectly. Next, you want to adhere the label to the scrapbook paper. I use these little scrapbook dots because they are so subtle. Note, sometimes there is enough glue still left on the back of the label that you won't even need any other type, which is nice. But sometimes it's good to reinforce it, just in case. Press the label carefully to your scrapbook paper and voila! If you want you can just stop here, and fill up your photo album with your lovely labels. The scrapbook paper I have is a variety pack with tons of patterns and colors, which is perfect. Or, you could do what I do and move on to...
Step 3:
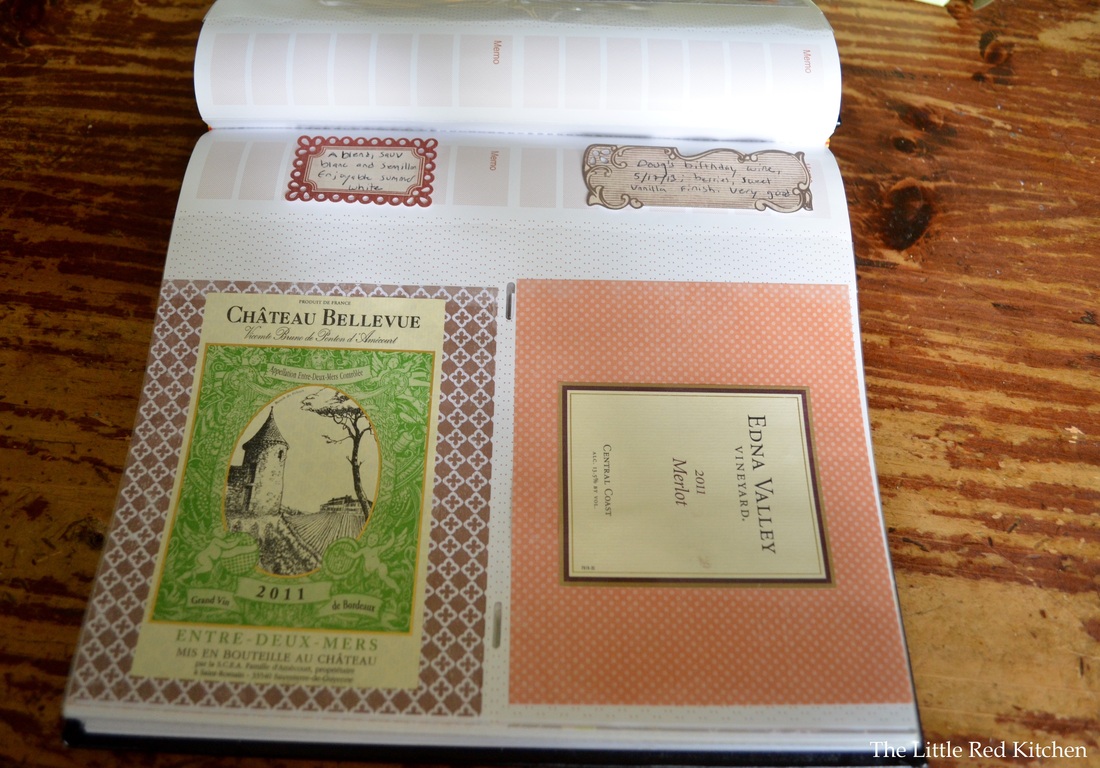
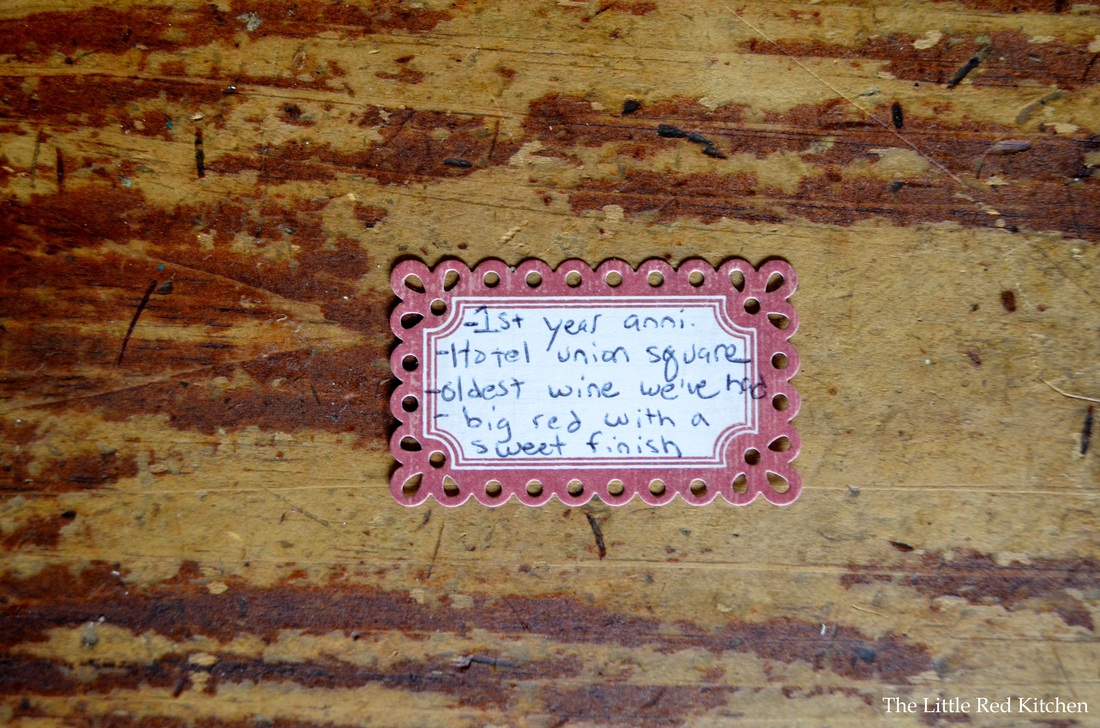
If you want to do tasting notes, or 'set the scene' notes, you can buy those little scrapbook labels and fill them out with details about your bottle. This is what I did for my most recent addition. Just add another glue dot or two and stick it in that memo section of the photo album. In a practical sense, you'll be able to go back through and see what you liked, what you didn't like, what paired well with that awesome pot roast or roast chicken that you make. And in an even better sense, you'll be able to see how many great occasions in your life you've been able to toast with an equally great glass of wine. That's really what wine means to me, and I hope that it will mean the same to you!
~Lauren
|


 RSS Feed